THE PUDDING INCIDENT

What have you been up to in the kitchen?

Monday, December 31, 2007

Best Cookbook EVER


This is an incredible and fantastic cookbook. You want it.

Coconut Mango Rice (aka, Heaven)

From the Oh So Fantastic "Cooking with all things Trader Joe's":

1/2 C Jasmine Rice
1/2 C water
1 C + 1/4 C Lite Coconut Milk
3 Tbsp Sugar
MANGO!

Combine the rice, water, sugar and 1 C Coconut Milk in a pot. Bring to a boil, then reduce heat to a simmer. Simmer, covered, for 30 minutes (or until rice is cooked), stirring occasionally. When rice is cooked, remove from heat and allow to sit for another 10 minutes.

Put dallop of rice on a plate. Drizzle a little of the reserved coconut milk on top, allowing to drip down the sides. Place mango on top. Enjoy!

Wednesday, November 28, 2007

Green Lentil Soup

Ahhh... comfort food...


1 cup green lentils (red or puy lentils may be substituted)
5 tablespoons olive oil
1 large onion chopped
2 garlic cloves finely chopped

2 teaspoons cumin seeds, crushed + 3/4 teaspoon tumeric
OR
1/2 teaspoon yellow curry powder

2 1/2 cup chicken or vegetable stock
salt and ground black pepper
2 tablespoons coarsely chopped cilantro

(I added to this recipe 1 bay leaf and 1 sprig of fresh rosemary)


Put the lentils in a saucepan and cover with cold water. Bring to a boil and boil rapidly for 10 minutes. Drain.

Heat 2 tablespoons of the oil in a pan and saute two-thirds of the chopped onion with the garlic, cumin, tumeric (or curry powder) for 3 minutes, stirring. Add the lentils, stock, and 2 1/2 cups water. Bring to a boil, reduce the heat, cover and simmer gently for 30 minutes, until the lentils are soft.

Saute the remaining onion in the remaining oil until golden.

Use a potato masher to lightly mash the lentils and make the soup pulpy. Reheat gently and season with salt and pepper to taste. Garnish with fried onions and cilantro (I added some grated parmesan cheese and chili-pepper flakes)

Friday, November 16, 2007

A Lovely Autumn Meal

This is the meal I, alone, made from scratch, all of it, for my mother's Birthday! It was divine.

"Warm spices and caramelized onions underscore the natural sweetness of pumpkin and butternut squash in this comforting dish. The easy swirl of ginger butter at the end adds a bit of flavor and a lot of style. Prep and Cook Time: 1 3/4 hours. Notes: You can substitute 3 1/2 lbs. packaged peeled-and-cubed butternut squash for the pumpkin and squash called for below: Skip steps 1 and 3, decrease the amount of broth to 7 cups, and add the squash with the broth and carrots to the onion mixture in step 4. Cook until all vegetables are tender, about 25 minutes."

Ingredients
2 pounds Sugar Pie or other baking pumpkin
2 pounds butternut or acorn squash
8 cups reduced-sodium chicken broth, divided
7 tablespoons butter, divided
2 medium onions, chopped
About 1 tsp. salt
4 cloves garlic, chopped
2 tablespoons plus 1 tsp. freshly grated ginger, divided
1 teaspoon ground ginger
1/4 teaspoon freshly ground nutmeg
1/8 teaspoon ground cloves
1/8 teaspoon freshly ground cardamom seeds (from about 4 pods)
2 carrots, peeled and chopped
1/2 cup packed light brown sugar

Preparation
1. Preheat oven to 375°. Cut pumpkin and squash in half lengthwise. Scoop out seeds and any stringy parts. Put flesh side up in a large roasting pan with 1 cup broth. Cover pan with foil and bake until vegetables are tender when pierced with a fork, about 1 hour.
2. Meanwhile, melt 3 tbsp. butter in a large pot over medium heat. Add onions and 1 tsp. salt. Cook, stirring occasionally, until onions are soft and start to look creamy, about 5 minutes. Reduce heat to low or medium-low and cook onions, stirring every few minutes, until they turn a caramel color and become quite sweet, about 30 minutes. Set aside.

3. When pumpkin and squash are tender, scoop out flesh and set aside; discard skins. Reserve any liquid in bottom of pan.

4. Return pot with onions to medium-high heat. Add garlic and 2 tbsp. fresh ginger. Cook, stirring, until fragrant, about 2 minutes. Add ground ginger, nutmeg, cloves, and cardamom. Cook, stirring, 1 minute. Add remaining 7 cups broth, the carrots, cooked pumpkin and squash, and reserved liquid from roasting pan. Bring to a boil, then reduce heat and simmer until carrots are tender, about 15 minutes.

5. Whirl vegetables in a blender (in batches) until completely smooth. (For silky-smooth soup, you can pour the puréed soup through a strainer.) Return to pot and stir in brown sugar. Season with salt to taste. Keep warm over low heat.

6. Put a small bowl or measuring cup next to the stove. Melt remaining 4 tbsp. butter in a small frying pan over medium-high heat. Add remaining 1 tsp. fresh ginger. Cook, stirring occasionally, until butter starts to foam. Stir mixture constantly until it starts to brown. Pour mixture into waiting bowl or measuring cup. Divide soup among 8 bowls and serve hot, with a swirl of ginger browned butter in each serving.

Note: Nutritional analysis is per serving.

Yield
Makes 8 servings

Nutritional Information
CALORIES 248(36% from fat); FAT 10g (sat 6.3g); PROTEIN 5.6g; CHOLESTEROL 27mg; SODIUM 982mg; FIBER 3.2g;
CARBOHYDRATE 37g

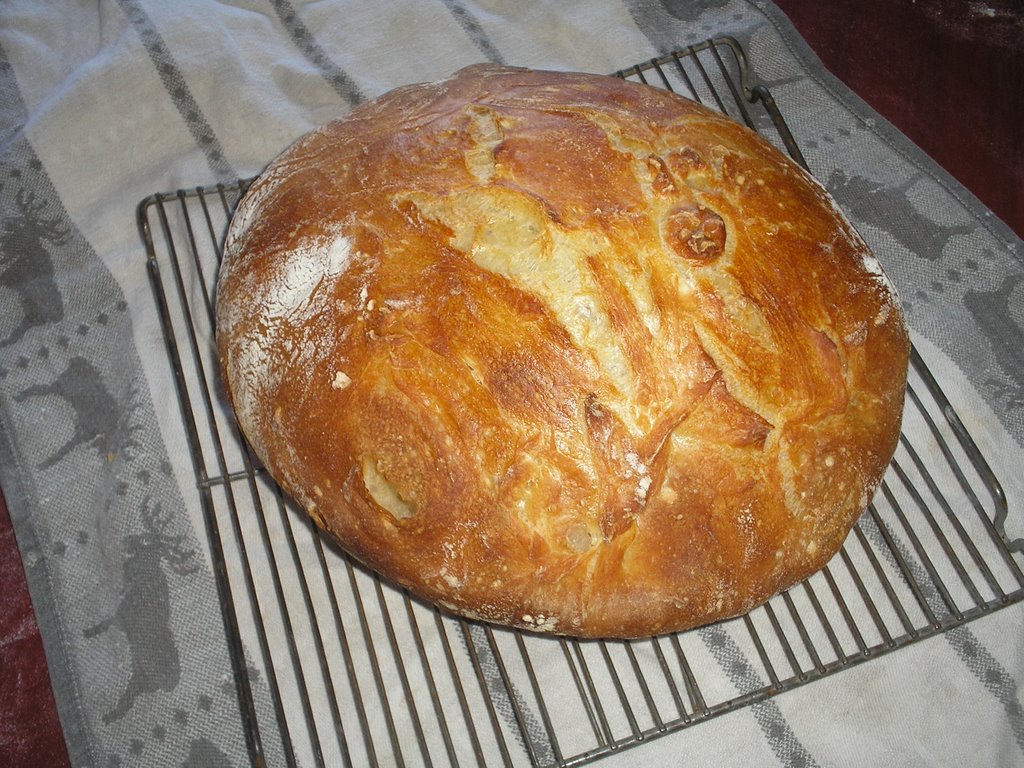
I ALSO made this!!! From scratch, mind you, and if any of you are familiar with my past cooking endeavors, you will be impressed at my progress!

Ingredients
1 package (1/4 oz.) active dry yeast
2 cups all-purpose flour
About 1 cup semolina flour
4 tablespoons olive oil, divided
2 teaspoons salt, divided
1 medium red onion
1 tablespoon fresh rosemary leaves, minced
2 tablespoons balsamic vinegar
1/2 teaspoon red chile flakes
4 ounces gorgonzola or other blue cheese, crumbled

Preparation
1. In a large bowl, dissolve yeast in 1 cup warm water (about 100°). Let sit until foamy, about 5 minutes. Stir in flours, 2 tbsp. oil, and 1 tsp. salt. (Dough will be stiff.) Cover bowl with plastic wrap and let sit in a warm place to rise until 1 1/2 times its original volume, about 1 hour.
2. Meanwhile, halve onion lengthwise, peel, and thinly slice. In a bowl, combine onion and rosemary with remaining 2 tbsp. oil, the vinegar, remaining 1 tsp. salt, and the chile flakes. Cover; set aside.

3. Preheat oven to 450°. Lightly sprinkle 2 baking sheets with semolina and set aside. Turn risen dough out onto a floured surface. Knead dough just until it feels smooth, about 10 times. Divide into 32 balls. Set 16 balls aside and cover with plastic wrap; roll the others as thinly as possible. Put 8 rounds on each baking sheet. Top each with a scant 1 tbsp. onion mixture and 1 1/2 tsp. blue cheese. Bake until browned and sizzling, about 15 minutes. Repeat with remaining dough balls, onion mixture, and cheese. Serve hot or warm.

Wine pairing: Chateau Ste. Michelle Cold Creek Vineyard Riesling 2006 (Columbia Valley; $14)

Note: Nutritional analysis is per flatbread.

Yield
Makes 32 small flatbreads

Nutritional Information
CALORIES 80(34% from fat); FAT 3g (sat 1g); PROTEIN 2.4g; CHOLESTEROL 3.1mg; SODIUM 195mg; FIBER 0.5g; CARBOHYDRATE 11g

Yummy!

Monday, October 29, 2007

Seasonal tradition

dinner_1

We are fast approaching the time of year when everything seems to revolve around food. In particular, Halloween, Thanksgiving, and of course Christmas. What are some of your favorite family food traditions from this time of year? What un-traditional things have you added to your holiday menu?

Thursday, October 18, 2007

So, for those who have seen Parker, mine and Marina's brother, we know how skinny that kid is. He also eats immense amount of food. However, he has one snack that I think, if allowed, he would live on forever: Graham crackers with peanut butter and nutella.

Ingredients:

Graham crackers (regular is preferred, but cinnamon, chocolated, etc are acceptable.)
Jar of Peanut Butter
Jar of Nutelle (available in most grocery stores.)
Milk

Utensils:
Spreading knife (butter knife.)
Cup (for the milk)
Massive amounts of napkins

Directions:
1. Fill glass with milk.
2. Take one full graham cracker and snap it in two to make two, equally sized halves.
3. On one half, evenly spread peanut butter
4. On second half, evenly spread nutella.
5. Smoosh halfs together in sandwich fashion
6. Dip in milk for 2-3 seconds.
7. Enjoy.

Though it seems simple and self-explanitory, this snack is filling, fatty, and fantastic. Good for growth, both vertically and horizontally.

Thursday, October 04, 2007

Super Easy Yummy Food - Orzo Salad

Check it out-

Boil about 8 oz of Orzo till its al dente. Remove from heat, add some frozen peas to the hot water. While the Peas are warming, in a bowl dump 1/3 c. Olive Oil and Vinegar salad dressing, a package of crumbled feta (i used garlic herb), and if you so desire, fresh mint/garbanzo beans/tuna/whatever turns you on.

Drain the Orzo and Peas, dump into the bowl, mix well and serve.

SOOOOOOOOOOOOOOOOO good, soooooooooooo easy.

Sunday, July 29, 2007

Spaghetti Puttanesca, Cooks Illustrated

Ah, yes, last night we prepared Spaghetti Puttanesca from Cooks Illustrated. Since we like anchovies we thought it would be great. And it was...exceeded our expectations. AND it was very easy and quick.

Spaghetti Puttanesca
Italian Classics, Cooks Illustrated


The pasta and sauce cook in about the same amount of time. If you like the fruitiness of extra virgin olive oil, toss 1 tablespoon into the sauces pasta before serving.

Serves four

4 medium cloves garlic, minced to a paste or pressed through a press
Salt
1 pound spaghetti
2 tablespoons olive oil
1 teaspoon hot red pepper flakes
4 teaspoons minced anchovies (about eight fillets)
1 can (28 oz) diced tomatoes, drained, reserve ½ cup juice
3 tablespoons capers, rinsed
½ cup black olives (kalamata) pitted and chopped coarse
¼ cup minced fresh parsley leaves and or basil

1. Bring 4 quarts of water to a rolling boil in a large pot. Meanwhile, mix the garlic with 1 tablespoon water in a small bowl; set aside. When the water is boiling, add 1 tablespoon salt and the pasta; stir to separate the noodles. Immediately heat the oil, garlic mixture, hot red pepper flakes, and anchovies in a large skillet over medium heat. Cook, stirring frequently, until the garlic is fragrant but not browned, 2 to 3 minutes. Stir in the tomatoes and simmer until slightly thickened, about 8 minutes.

2. Cook the pasta until al dente. Drain, then return the pasta to the pot. Add ¼ up reserved tomato juice and toss to combine.

3. Stir the capers, olives, and parsley into the sauce. Pour the sauce over the pasta and toss to combine, adding more tomato juice to moisten if necessary. Adjust the seasonings with salt to taste and serve immediately.


NB: We added some fresh ground black pepper and served with shaved parmesan cheese, soda water, and a fresh green salad, bread may be an option. Enjoy. It served the two of us and leftovers.

Monday, July 23, 2007

Summer Tart

This was my first foray in the world of tarts, and it was actually far easier than expected. I did learn one thing for certain - when mixing recipes, as I did with the use of a crust recipe from one source and the filling from another - make sure both are adjusted to fit the same size pan. I made slightly more filling than needed, and it did not set quite as expected. Even with some ingredient substitutions, this recipe was simple and delicious.


For the crust:
(recipe from: The Food Lover's Guide to Paris, July 1999)

8 tbls unsalted butter, melted and cooled
1/2 cup sugar
1/2 teaspoon pure vanilla extract
1/2 teaspoon fine sea salt
1 cup plus 1 tbls unbleached all-purpose flour
1/4 cup almond meal for flour

4 tbls finely ground unblanched almonds

Preheat oven to 350 F

Butter (or don't - it seems to work out fine either way) the bottom and sides of a 9-inch fluted tart pan with removable bottom. Set aside.

In a large bowl, combine the melted butter and the sugar, and using a wooden spoon, stir to blend. Add the remaining ingredients and stir to form soft cookie-like dough. Transfer the dough to the center of the buttered pan. Using the tips of your fingers, evenly press the pastry along the bottom and up the sides of the pan. The pastry will be quite thin.

Place the pan in the center of the oven and bake until the dough is slightly puffy and set, 12 to 15 minutes. Sprinkle the ground almonds over the bottom of the crust. (This will help prevent the crust from becoming soggy. I had no ground almonds, so I used a light dusting of the almond meal flour with mixed results.)

For the filling:
(recipe from: Eric Kayser's Sweet and Savory Tarts)

Keep in mind these measurements are for a larger pan than the crust recipe - rectangular 12 x 18 inch or round 10-inch - or one could make more crust and use the bigger pan...

2 lb plums (or any other fruit - the cinnamon seasoning of this tart goes well with all the stone-fruit I tried)
3 eggs
1 1/4 cups granulated sugar
1 cup ground almonds (didn't have this, used some of the almond meal, but not a whole cup. probably why it did not set as hoped)
1 tbls ground cinnamon, and a little more for decoration
1/2 cup whipping cream
3 tbls unsalted butter, melted

Preheat the oven to 325 F (after the crust is done)

Wash and dry the plums. Cut in two and remove the stones.

In a mixing bowl, beat the eggs together with the sugar. Add the ground almonds, the cinnamon, and the whipping cream. Mix through. Add the melted butter and stir until blended.

Pour half the batter into the shell and arrange the plum halves on it, overlapping slightly, starting from just inside the edge of the pan. Realize you didn't have enough plums and hurridly wash, dry, and cut some other fruit to fill in the center. Pour the rest of the batter over the plums and bake for 20 minutes.

Serve cool, decorate with confectioner's sugar or icing (more sugar?? I skipped that - the fruit and filling are sweet enough, with just enough plum tartness to make it taste like summer).

Monday, June 18, 2007

Yummy Adult Beverage


Summer is upon us, and while I can't speak for my California friends, I can tell you that it is hotter than sin here in Virginia. While I loathe the heat and humidity with almost every fiber of my soul, it is good for one thing: Sitting outside in the mid to late evening, chatting with friends, watching the sunset, and sipping on my favorite adult beverage, the Mojito.

While not a necessarily complicated drink to make, our friends at Bacardi have made it considerably easier by producing one of their mixers as a Mojito. Tastes as good as the original, and you don't have to worry about what the hell a "Simple Syrup" is. So grab your glasses, head outside, and enjoy one with me!


You will need:

Fresh Mint
Lime
Bacardi Frozen Mojito Mixer (usually in the freezer section right next to the Frozen Concentrated Orange Juice)
Clear Run (i.e. Bacardi Superior)
Club Soda

The instructions are on the can. Mix the frozen stuff, rum and club soda in a pitcher. Tear up some mint, squash it in your fingers, and put it in the glass. Squeeze some lime over it. Add ice, pour Mojito, garnish with more lime. DRINK!

As I mentioned, this is my favorite adult beverage. I hope you get a chance to try it out, and that you enjoy it as much as I do.

Monday, June 11, 2007

Keeping on with the Black Bean theme...

I got this recipe for Corn and Black Bean Salsa from a friend, and I'm addicted.

1 can of FiestaCorn, or whatever its called
1 can black beans
Juice of Lime
some chopped cilantro
some chopped green onion

Dump everything in a bowl. I suggest rinsing the black beans of their goopy liquid. Stick in fridge to allow flavors to "marry, rather than simply co-habitate".

You can eat this alone, although I have had it on grilled shrimp tacos, and let me tell you, it's amazing.

My Corn and Black Bean Salsa Haiku:

Black bean corn salsa,
Tiny hills of yellow, black.
Flavors of summer.

Saturday, May 26, 2007

Black Bean Chili

Cheap, healthy, delicious, and filling - you'll hardly notice there's no beef in it (though I suppose if that's your thing, you could do it). This recipe actually was listed as a stew, but it tasted flat. I thought the only thing missing was a few tablespoons of chili powder, and wha-la - it became a chili. I was surprised by how good this turned out, and how hearty it is.

15oz can of black beans (don't drain!)
1lb can of mexican style stewed tomatoes (don't drain!)
7 or so B-red potatoes (diced)
2 carrots (sliced)
3 celery stalks (sliced)
1 can of corn (i used mexican corn with chiles and peppers in it)
1 teaspoon dried basil
1.5 teaspoons ground cumin
2 tablespoons chili powder (or to taste)
1 small can of tomato paste
(maybe some sour cream, cilantro, and cheese to throw on top - and there's room to tofu this sucker up)

In a large pot, cook the potatoes, celery, and carrots in a bit of olive oil until slightly tender (ten minutes or so). Then throw everything else in, mix, and simmer for about half an hour.

Wednesday, May 16, 2007

Ode to my Bagel

Oh lovely lovely bagel
With your roundness so complete
Toasted, smothered in peanut butter
Nothing can compete.

Little dots of blueberries
Really pull the whole thing through
I'd eat you every morning,
You're so satisfying to chew.

I usually like to get
a cup of coffee on the side
Although sometimes odwalla's better
Especially after a morning ride

So bagel, with all my love,
I send this poem out to you
Till tomorrow, or the next time
For now it’s simply "Adieu".

Friday, May 04, 2007

The Gorgonzola Cheesecake Dare

My mother was visiting recently, and downloaded this recipe to my desktop - she swears it is delicious, but I'm a bit wary of stinky cheese getting near the beloved cheesecake recipe - I have not yet been brave enough to try it - anyone else brave enough to take up the challenge?

Gorgonzola Cheese Cake

Crust:
4 ½ cups water
1 ½ cups corn meal
1 tablespoon garlic, minced
2 teaspoons salt
2 tablespoons dried oregano
½ cup Asiago cheese, grated

Pre-heat oven to 375 degrees.
Grease a 12 by 17 sheet pan. In a sauce pan, bring water to a boil and stir in corn meal, garlic, salt and oregano. Reduce heat to low and simmer for 15 minutes, stirring every few minutes. When mixture is cooked, stir in Asiago cheese and pour into the sheet pan and smooth out evenly. Set aside and let cool.

Filling:
12 cloves garlic, chopped
1 pound gorgonzola cheese, room temperature
5 (8 ounce) packages cream cheese, room temperature
5 eggs, room temperature

In a large mixer, place cream cheese, gorgonzola and garlic. Combine thoroughly. Add the eggs one at a time, blending well after each addition. Pour into corn meal crust and smooth out. Place cheese cake in middle of center rack. Bake for approximately 30 minutes, or until “insta-read” thermometer reads 160 degrees. Remove and let cool to room temperature.

This versatile dish can either be served as an appetizer by cutting into 1 inch cubes or as an entrée by cutting into 4 by 4 squares and served with your favorite salad and a glass of chardonnay.

(from Alexander Valley Vineyards)

Friday, March 02, 2007

Chicken Satay

That's right. With amazing peanut sauce you can make from scratch. This recipe is from Quick & Easy Thai: 70 Everyday Recipes.

Marinade for chicken
1/2 cup unsweetened coconut milk
1 teaspoon fish sauce
1 teaspoon brown sugar
1 teaspoon curry powder (yellow)
1 pound boneless, skinless chicken thighs or breasts

Spicy Peanut Sauce
3/4 cup unsweetened coconut milk
1 tablespoon red curry paste
2 teaspoons roasted chili paste (optional - I didn't have any, and it was PLENTY spicy)
1/2 cup chicken broth or water
1 tablespoon fish sauce
1 tablespoon palm sugar or brown sugar
1/4 chunky peanut butter or very finely ground peanuts
1 tablespoon freshly squeezed lime juice (didn't have any, used the only citrus in the house right now, orange)

about 60 bamboo skewers (i didn't need nearly so many, 20 ought to be enough) soaked in water for at least 30 minutes


Combine the coconut milk, fish sauce, brown sugar and curry powder in a medium baking dish. Cut chicken thighs into generous bite-size chunks, and cut breast meat lengthwise into 1/2-inch strips. Add the meat to the marinade, mix well. Cover and refrigerate for at least 30 minutes and as long as overnight.

To prepare the peanut sauce, bring the coconut milk to a gentle boil in a medium saucepan over medium-high heat. Add the curry paste and roasted chili paste and cook for 4 ot 5 minutes, mashing and stirring occasionally to dissolve them. Add the chicken broth, fish sauce, palm sugar, peanut butter and lime juice and cook 1 minute more, stirring well to make a smooth sauce. Remove from heat, transfer to a serving bowl, and set aside to cool.

Thread meat onto bamboo skewers and cook on a lightly oiled, hot grill or under a broiler, turning often, until browned and cooked through, 4-6 minutes. Serve immediately!

Thursday, February 22, 2007

The Great Granola Disaster

The aptly named food writer, Mark Bittman, swept me off my feet with his recipe for no-knead bread, so of course I couldn’t wait to try his recipe for granola. Never mind that no one in my family likes granola. If Mark Bittman said it was good, I wanted to try it.

In his recipe, Mark lists honey or maple syrup as sweeteners, although he prefers to use maple syrup. I would, too, but at the time of my experiment only honey and brown sugar resided in my pantry. He also said to use any combination of nuts and seeds, such as almonds, pecans, walnuts, sesame seeds, or sunflower seeds. Well, I had loads of sunflower seeds -- salted ones at that -- so that’s what I used.

The granola I produced, all eight cups of it, turned out salty, sunflowery, and slightly burned. Trying to avoid a total loss, I made about ten dozen granola cookies, which I thought were pretty good, but they haven’t been moving too quickly. Usually, cookies last about 30 minutes at our house, and something tells me that we’ll still be looking at granola cookies 30 days from now.

Crunchy Granola
Makes 8 cups

6 cups old-fashioned rolled oats
2 cups mixed nuts & seeds, unsalted: sunflower seeds, sesame seeds, pecans, almonds, cashews, walnuts
1 cup dried unsweetened shredded coconut, optional
1 teaspoon ground cinnamon
Dash salt
1/2 to 1 cup maple syrup or honey
1 cup riasins or dried fruit, optional

Preheat oven to 350 degrees. In a bowl, combine oats, nuts and seeds, coconut, cinnamon, salt and sweetener. Place on a sheet pan and put in oven. Bake for 30 minutes, stirring occasionally. Mixture should brown evenly; the browner it gets without burning, the crunchier the granola will be.

Remove pan from oven and add raisins or dried fruit. Cool on a rack, stirring once in a while until granola reaches room temp. Transfer to a sealed container and store in refrigerator; it will keep indefinitely, especially if no one eats it.

Tuesday, February 20, 2007

Ow

While making a spicy Thai Tuna salad last night...

(1 can tuna, 3 tablespoons fish sauce, 1 tablespoon sugar, 3 tablespoons lime or lemon juice, 2 chopped green onions, 1 teaspoon minced fresh chili pepper, 1 small chopped shallot, chopped fresh cilantro, 1 tablespoon fresh grated ginger, mix well, serve with crackers, or wrap in lettuce)

...I managed to rub my eyes with fingers saturated in serrano chili pepper oils. Good news: I didn't go blind. Bad news: my eyeballs were on fire for a few hours. Next time, gloves. Or get someone else to chop the peppers.

Monday, January 15, 2007

The best bread ever


Presented here is an excerpt from an article that apeared last week in the Press Democrat. So far I have made three loaves of this bread, and have two more rising at this moment. It produces a rustic, Italian-style loaf that is delicious!

I have found that it needs more salt than the recipe calls for: 1-1/2 to 1-3/4 teaspoons tastes better. Also, the amount of water is approximate, although in the recipe it appears to be precise. Usually I use closer to two cups of water.


Greatest thing since sliced . . . . . ?

By MARK BITTMAN
NEW YORK TIMES


Jim Lahey's method of breadmaking requires no kneading. It uses no special ingredients, equipment or techniques. It takes very little effort. It produces a loaf that is incredible, a fine-bakery quality, European-style boule that will blow your mind.

It accomplishes all of this by combining a number of unusual features. Most notable is that you'll need about 24 hours to create a loaf; time does almost all the work. Lahey's dough uses very little yeast, a quarter teaspoon, and he compensates for this tiny amount by fermenting the dough very slowly. He mixes a very wet dough, about 42 percent water, which is at the high end of the range that professional bakers use to create crisp crust and large, well-structured crumb, both of which are evident in this loaf.

The dough is so sticky that you couldn't knead it if you wanted to. It is mixed in less than a minute, then sits in a covered bowl, undisturbed, for about 18 hours. It is then turned out onto a board for 15 minutes, quickly shaped, and allowed to rise again for a couple of hours. Then it's baked. That's it.

What makes Lahey's process revolutionary is the resulting combination of great crumb, lightness, incredible flavor - long fermentation gives you that - and an enviable, crackling crust, the feature of bread that most frequently separates the amateurs from the pros.

Lahey achieves the perfect crust by putting the dough in a preheated covered pot - a common one, a heavy one, but nothing fancy. For one loaf he used an old Le Creuset enameled cast iron pot; for another, a heavy ceramic pot. I have used cast iron with great success. By starting this very wet dough in a hot, covered pot, Lahey lets the crust develop in a moist, enclosed environment. The pot is in effect the oven, and that oven has plenty of steam in it. Once uncovered, a half-hour later, the crust has time to harden and brown, still in the pot, and the bread is done.

The entire process is incredibly simple, and, in the time I've been using it, absolutely reliable. Lahey thinks imprecision isn't much of a handicap and, indeed, his method seems to iron out the wrinkles: "I encourage a somewhat careless approach," he says.

It is best made with bread flour, but all-purpose flour works fine. I've played with whole-wheat and rye flours, too; the results are fantastic. The baking itself is virtually foolproof, so the most important aspect is patience. Long, slow fermentation is critical.

No-Knead Bread

Makes one 1-1/2-pound loaf
Time: About 1-1/2 hours plus 14 to 20 hours' rising

3 cups (430 grams) all-purpose or bread flour, more for dusting

1/4 teaspoon (1 gram) instant, or other, yeast

1-1/4 teaspoons (8 grams) salt

- Cornmeal or wheat bran as needed.

1. In a large bowl combine flour, yeast and salt. Add 1 1/4 cups (345 grams) water, and stir until blended; dough will be shaggy and sticky. Cover bowl with plastic wrap. Let dough rest at least 12 hours, preferably about 18, and up to 24, at warm room temperature, about 70 degrees.

2. Dough is ready when its surface is dotted with bubbles. Lightly flour a work surface and place dough on it; sprinkle it with a little more flour and fold it over on itself once or twice. Cover loosely with plastic wrap and let rest about 15 minutes.

3. Using just enough flour to keep dough from sticking to work surface or to your fingers, gently and quickly shape dough into a ball. Generously coat a cotton towel (not terry cloth) with flour, wheat bran or cornmeal; put dough seam side down on towel and dust with more flour, bran or cornmeal. Cover with another cotton towel and let rise for 2 to 3 hours. When it is ready, dough will be more than double in size and will not readily spring back when poked with a finger.

4. At least a half-hour before dough is ready, heat oven to 450 degrees. Put a 6- to 8-quart heavy covered pot (cast iron, enamel, Pyrex or ceramic) in oven as it heats. When dough is ready, carefully remove pot from oven. Slide your hand under towel and turn dough over into pot, seam side up; it may look like a mess, but that is OK. Shake pan once or twice if dough is unevenly distributed; it will straighten out as it bakes. Cover with lid and bake 30 minutes, then remove lid and bake another 15 to 30 minutes, until loaf is beautifully browned. Cool on a rack.

Monday, January 08, 2007

Food Porn

Last year, I received a gift subscription to Bon Appetit - food porn deluxe. I've found a few bits of info and some recipes useful, but overall, a magazine about high-brow entertaining (I don't even own a table and chairs, so "tablescape" means nothing to me) and ambitious, restaurant-quality recipes did little more than provide me with pretty pictures of stuff I would never make.

Now I subscribe to Cook's Illustrated, which, without any ads or glossy color-photos, still manages to inspire me to try new things. The best section has tips from readers, packed full of practical and creative kitchen solutions to common problems.

Still, I'm in the market for a second foodie subscription, preferably one with pretty pictures and healthy recipes. Any recommendations?