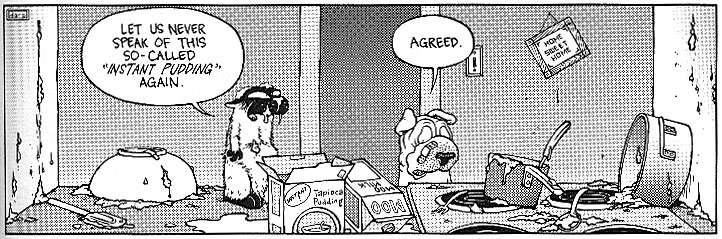
THE PUDDING INCIDENT

What have you been up to in the kitchen?

Monday, July 23, 2007

Summer Tart

This was my first foray in the world of tarts, and it was actually far easier than expected. I did learn one thing for certain - when mixing recipes, as I did with the use of a crust recipe from one source and the filling from another - make sure both are adjusted to fit the same size pan. I made slightly more filling than needed, and it did not set quite as expected. Even with some ingredient substitutions, this recipe was simple and delicious.


For the crust:
(recipe from: The Food Lover's Guide to Paris, July 1999)

8 tbls unsalted butter, melted and cooled
1/2 cup sugar
1/2 teaspoon pure vanilla extract
1/2 teaspoon fine sea salt
1 cup plus 1 tbls unbleached all-purpose flour
1/4 cup almond meal for flour

4 tbls finely ground unblanched almonds

Preheat oven to 350 F

Butter (or don't - it seems to work out fine either way) the bottom and sides of a 9-inch fluted tart pan with removable bottom. Set aside.

In a large bowl, combine the melted butter and the sugar, and using a wooden spoon, stir to blend. Add the remaining ingredients and stir to form soft cookie-like dough. Transfer the dough to the center of the buttered pan. Using the tips of your fingers, evenly press the pastry along the bottom and up the sides of the pan. The pastry will be quite thin.

Place the pan in the center of the oven and bake until the dough is slightly puffy and set, 12 to 15 minutes. Sprinkle the ground almonds over the bottom of the crust. (This will help prevent the crust from becoming soggy. I had no ground almonds, so I used a light dusting of the almond meal flour with mixed results.)

For the filling:
(recipe from: Eric Kayser's Sweet and Savory Tarts)

Keep in mind these measurements are for a larger pan than the crust recipe - rectangular 12 x 18 inch or round 10-inch - or one could make more crust and use the bigger pan...

2 lb plums (or any other fruit - the cinnamon seasoning of this tart goes well with all the stone-fruit I tried)
3 eggs
1 1/4 cups granulated sugar
1 cup ground almonds (didn't have this, used some of the almond meal, but not a whole cup. probably why it did not set as hoped)
1 tbls ground cinnamon, and a little more for decoration
1/2 cup whipping cream
3 tbls unsalted butter, melted

Preheat the oven to 325 F (after the crust is done)

Wash and dry the plums. Cut in two and remove the stones.

In a mixing bowl, beat the eggs together with the sugar. Add the ground almonds, the cinnamon, and the whipping cream. Mix through. Add the melted butter and stir until blended.

Pour half the batter into the shell and arrange the plum halves on it, overlapping slightly, starting from just inside the edge of the pan. Realize you didn't have enough plums and hurridly wash, dry, and cut some other fruit to fill in the center. Pour the rest of the batter over the plums and bake for 20 minutes.

Serve cool, decorate with confectioner's sugar or icing (more sugar?? I skipped that - the fruit and filling are sweet enough, with just enough plum tartness to make it taste like summer).

Monday, June 18, 2007

Yummy Adult Beverage


Summer is upon us, and while I can't speak for my California friends, I can tell you that it is hotter than sin here in Virginia. While I loathe the heat and humidity with almost every fiber of my soul, it is good for one thing: Sitting outside in the mid to late evening, chatting with friends, watching the sunset, and sipping on my favorite adult beverage, the Mojito.

While not a necessarily complicated drink to make, our friends at Bacardi have made it considerably easier by producing one of their mixers as a Mojito. Tastes as good as the original, and you don't have to worry about what the hell a "Simple Syrup" is. So grab your glasses, head outside, and enjoy one with me!


You will need:

Fresh Mint
Lime
Bacardi Frozen Mojito Mixer (usually in the freezer section right next to the Frozen Concentrated Orange Juice)
Clear Run (i.e. Bacardi Superior)
Club Soda

The instructions are on the can. Mix the frozen stuff, rum and club soda in a pitcher. Tear up some mint, squash it in your fingers, and put it in the glass. Squeeze some lime over it. Add ice, pour Mojito, garnish with more lime. DRINK!

As I mentioned, this is my favorite adult beverage. I hope you get a chance to try it out, and that you enjoy it as much as I do.

Monday, June 11, 2007

Keeping on with the Black Bean theme...

I got this recipe for Corn and Black Bean Salsa from a friend, and I'm addicted.

1 can of FiestaCorn, or whatever its called
1 can black beans
Juice of Lime
some chopped cilantro
some chopped green onion

Dump everything in a bowl. I suggest rinsing the black beans of their goopy liquid. Stick in fridge to allow flavors to "marry, rather than simply co-habitate".

You can eat this alone, although I have had it on grilled shrimp tacos, and let me tell you, it's amazing.

My Corn and Black Bean Salsa Haiku:

Black bean corn salsa,
Tiny hills of yellow, black.
Flavors of summer.

Saturday, May 26, 2007

Black Bean Chili

Cheap, healthy, delicious, and filling - you'll hardly notice there's no beef in it (though I suppose if that's your thing, you could do it). This recipe actually was listed as a stew, but it tasted flat. I thought the only thing missing was a few tablespoons of chili powder, and wha-la - it became a chili. I was surprised by how good this turned out, and how hearty it is.

15oz can of black beans (don't drain!)
1lb can of mexican style stewed tomatoes (don't drain!)
7 or so B-red potatoes (diced)
2 carrots (sliced)
3 celery stalks (sliced)
1 can of corn (i used mexican corn with chiles and peppers in it)
1 teaspoon dried basil
1.5 teaspoons ground cumin
2 tablespoons chili powder (or to taste)
1 small can of tomato paste
(maybe some sour cream, cilantro, and cheese to throw on top - and there's room to tofu this sucker up)

In a large pot, cook the potatoes, celery, and carrots in a bit of olive oil until slightly tender (ten minutes or so). Then throw everything else in, mix, and simmer for about half an hour.

Wednesday, May 16, 2007

Ode to my Bagel

Oh lovely lovely bagel
With your roundness so complete
Toasted, smothered in peanut butter
Nothing can compete.

Little dots of blueberries
Really pull the whole thing through
I'd eat you every morning,
You're so satisfying to chew.

I usually like to get
a cup of coffee on the side
Although sometimes odwalla's better
Especially after a morning ride

So bagel, with all my love,
I send this poem out to you
Till tomorrow, or the next time
For now it’s simply "Adieu".

Friday, May 04, 2007

The Gorgonzola Cheesecake Dare

My mother was visiting recently, and downloaded this recipe to my desktop - she swears it is delicious, but I'm a bit wary of stinky cheese getting near the beloved cheesecake recipe - I have not yet been brave enough to try it - anyone else brave enough to take up the challenge?

Gorgonzola Cheese Cake

Crust:
4 ½ cups water
1 ½ cups corn meal
1 tablespoon garlic, minced
2 teaspoons salt
2 tablespoons dried oregano
½ cup Asiago cheese, grated

Pre-heat oven to 375 degrees.
Grease a 12 by 17 sheet pan. In a sauce pan, bring water to a boil and stir in corn meal, garlic, salt and oregano. Reduce heat to low and simmer for 15 minutes, stirring every few minutes. When mixture is cooked, stir in Asiago cheese and pour into the sheet pan and smooth out evenly. Set aside and let cool.

Filling:
12 cloves garlic, chopped
1 pound gorgonzola cheese, room temperature
5 (8 ounce) packages cream cheese, room temperature
5 eggs, room temperature

In a large mixer, place cream cheese, gorgonzola and garlic. Combine thoroughly. Add the eggs one at a time, blending well after each addition. Pour into corn meal crust and smooth out. Place cheese cake in middle of center rack. Bake for approximately 30 minutes, or until “insta-read” thermometer reads 160 degrees. Remove and let cool to room temperature.

This versatile dish can either be served as an appetizer by cutting into 1 inch cubes or as an entrée by cutting into 4 by 4 squares and served with your favorite salad and a glass of chardonnay.

(from Alexander Valley Vineyards)

Friday, March 02, 2007

Chicken Satay

That's right. With amazing peanut sauce you can make from scratch. This recipe is from Quick & Easy Thai: 70 Everyday Recipes.

Marinade for chicken
1/2 cup unsweetened coconut milk
1 teaspoon fish sauce
1 teaspoon brown sugar
1 teaspoon curry powder (yellow)
1 pound boneless, skinless chicken thighs or breasts

Spicy Peanut Sauce
3/4 cup unsweetened coconut milk
1 tablespoon red curry paste
2 teaspoons roasted chili paste (optional - I didn't have any, and it was PLENTY spicy)
1/2 cup chicken broth or water
1 tablespoon fish sauce
1 tablespoon palm sugar or brown sugar
1/4 chunky peanut butter or very finely ground peanuts
1 tablespoon freshly squeezed lime juice (didn't have any, used the only citrus in the house right now, orange)

about 60 bamboo skewers (i didn't need nearly so many, 20 ought to be enough) soaked in water for at least 30 minutes


Combine the coconut milk, fish sauce, brown sugar and curry powder in a medium baking dish. Cut chicken thighs into generous bite-size chunks, and cut breast meat lengthwise into 1/2-inch strips. Add the meat to the marinade, mix well. Cover and refrigerate for at least 30 minutes and as long as overnight.

To prepare the peanut sauce, bring the coconut milk to a gentle boil in a medium saucepan over medium-high heat. Add the curry paste and roasted chili paste and cook for 4 ot 5 minutes, mashing and stirring occasionally to dissolve them. Add the chicken broth, fish sauce, palm sugar, peanut butter and lime juice and cook 1 minute more, stirring well to make a smooth sauce. Remove from heat, transfer to a serving bowl, and set aside to cool.

Thread meat onto bamboo skewers and cook on a lightly oiled, hot grill or under a broiler, turning often, until browned and cooked through, 4-6 minutes. Serve immediately!

Thursday, February 22, 2007

The Great Granola Disaster

The aptly named food writer, Mark Bittman, swept me off my feet with his recipe for no-knead bread, so of course I couldn’t wait to try his recipe for granola. Never mind that no one in my family likes granola. If Mark Bittman said it was good, I wanted to try it.

In his recipe, Mark lists honey or maple syrup as sweeteners, although he prefers to use maple syrup. I would, too, but at the time of my experiment only honey and brown sugar resided in my pantry. He also said to use any combination of nuts and seeds, such as almonds, pecans, walnuts, sesame seeds, or sunflower seeds. Well, I had loads of sunflower seeds -- salted ones at that -- so that’s what I used.

The granola I produced, all eight cups of it, turned out salty, sunflowery, and slightly burned. Trying to avoid a total loss, I made about ten dozen granola cookies, which I thought were pretty good, but they haven’t been moving too quickly. Usually, cookies last about 30 minutes at our house, and something tells me that we’ll still be looking at granola cookies 30 days from now.

Crunchy Granola
Makes 8 cups

6 cups old-fashioned rolled oats
2 cups mixed nuts & seeds, unsalted: sunflower seeds, sesame seeds, pecans, almonds, cashews, walnuts
1 cup dried unsweetened shredded coconut, optional
1 teaspoon ground cinnamon
Dash salt
1/2 to 1 cup maple syrup or honey
1 cup riasins or dried fruit, optional

Preheat oven to 350 degrees. In a bowl, combine oats, nuts and seeds, coconut, cinnamon, salt and sweetener. Place on a sheet pan and put in oven. Bake for 30 minutes, stirring occasionally. Mixture should brown evenly; the browner it gets without burning, the crunchier the granola will be.

Remove pan from oven and add raisins or dried fruit. Cool on a rack, stirring once in a while until granola reaches room temp. Transfer to a sealed container and store in refrigerator; it will keep indefinitely, especially if no one eats it.

Tuesday, February 20, 2007

Ow

While making a spicy Thai Tuna salad last night...

(1 can tuna, 3 tablespoons fish sauce, 1 tablespoon sugar, 3 tablespoons lime or lemon juice, 2 chopped green onions, 1 teaspoon minced fresh chili pepper, 1 small chopped shallot, chopped fresh cilantro, 1 tablespoon fresh grated ginger, mix well, serve with crackers, or wrap in lettuce)

...I managed to rub my eyes with fingers saturated in serrano chili pepper oils. Good news: I didn't go blind. Bad news: my eyeballs were on fire for a few hours. Next time, gloves. Or get someone else to chop the peppers.

Monday, January 15, 2007

The best bread ever


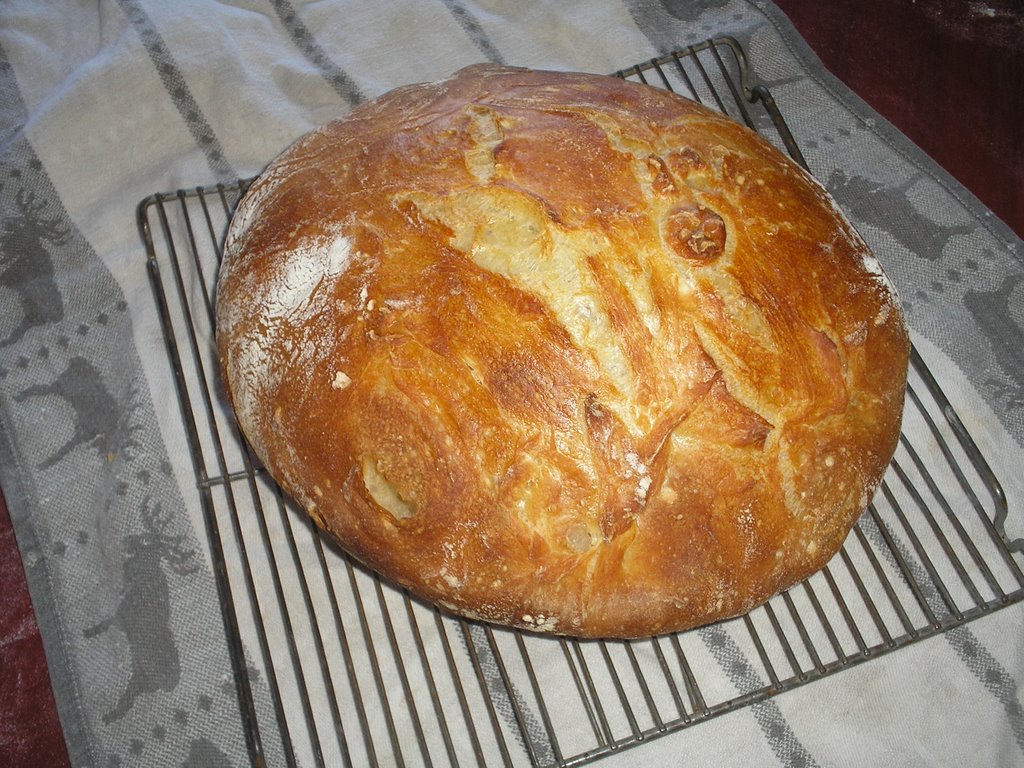
Presented here is an excerpt from an article that apeared last week in the Press Democrat. So far I have made three loaves of this bread, and have two more rising at this moment. It produces a rustic, Italian-style loaf that is delicious!

I have found that it needs more salt than the recipe calls for: 1-1/2 to 1-3/4 teaspoons tastes better. Also, the amount of water is approximate, although in the recipe it appears to be precise. Usually I use closer to two cups of water.


Greatest thing since sliced . . . . . ?

By MARK BITTMAN
NEW YORK TIMES


Jim Lahey's method of breadmaking requires no kneading. It uses no special ingredients, equipment or techniques. It takes very little effort. It produces a loaf that is incredible, a fine-bakery quality, European-style boule that will blow your mind.

It accomplishes all of this by combining a number of unusual features. Most notable is that you'll need about 24 hours to create a loaf; time does almost all the work. Lahey's dough uses very little yeast, a quarter teaspoon, and he compensates for this tiny amount by fermenting the dough very slowly. He mixes a very wet dough, about 42 percent water, which is at the high end of the range that professional bakers use to create crisp crust and large, well-structured crumb, both of which are evident in this loaf.

The dough is so sticky that you couldn't knead it if you wanted to. It is mixed in less than a minute, then sits in a covered bowl, undisturbed, for about 18 hours. It is then turned out onto a board for 15 minutes, quickly shaped, and allowed to rise again for a couple of hours. Then it's baked. That's it.

What makes Lahey's process revolutionary is the resulting combination of great crumb, lightness, incredible flavor - long fermentation gives you that - and an enviable, crackling crust, the feature of bread that most frequently separates the amateurs from the pros.

Lahey achieves the perfect crust by putting the dough in a preheated covered pot - a common one, a heavy one, but nothing fancy. For one loaf he used an old Le Creuset enameled cast iron pot; for another, a heavy ceramic pot. I have used cast iron with great success. By starting this very wet dough in a hot, covered pot, Lahey lets the crust develop in a moist, enclosed environment. The pot is in effect the oven, and that oven has plenty of steam in it. Once uncovered, a half-hour later, the crust has time to harden and brown, still in the pot, and the bread is done.

The entire process is incredibly simple, and, in the time I've been using it, absolutely reliable. Lahey thinks imprecision isn't much of a handicap and, indeed, his method seems to iron out the wrinkles: "I encourage a somewhat careless approach," he says.

It is best made with bread flour, but all-purpose flour works fine. I've played with whole-wheat and rye flours, too; the results are fantastic. The baking itself is virtually foolproof, so the most important aspect is patience. Long, slow fermentation is critical.

No-Knead Bread

Makes one 1-1/2-pound loaf
Time: About 1-1/2 hours plus 14 to 20 hours' rising

3 cups (430 grams) all-purpose or bread flour, more for dusting

1/4 teaspoon (1 gram) instant, or other, yeast

1-1/4 teaspoons (8 grams) salt

- Cornmeal or wheat bran as needed.

1. In a large bowl combine flour, yeast and salt. Add 1 1/4 cups (345 grams) water, and stir until blended; dough will be shaggy and sticky. Cover bowl with plastic wrap. Let dough rest at least 12 hours, preferably about 18, and up to 24, at warm room temperature, about 70 degrees.

2. Dough is ready when its surface is dotted with bubbles. Lightly flour a work surface and place dough on it; sprinkle it with a little more flour and fold it over on itself once or twice. Cover loosely with plastic wrap and let rest about 15 minutes.

3. Using just enough flour to keep dough from sticking to work surface or to your fingers, gently and quickly shape dough into a ball. Generously coat a cotton towel (not terry cloth) with flour, wheat bran or cornmeal; put dough seam side down on towel and dust with more flour, bran or cornmeal. Cover with another cotton towel and let rise for 2 to 3 hours. When it is ready, dough will be more than double in size and will not readily spring back when poked with a finger.

4. At least a half-hour before dough is ready, heat oven to 450 degrees. Put a 6- to 8-quart heavy covered pot (cast iron, enamel, Pyrex or ceramic) in oven as it heats. When dough is ready, carefully remove pot from oven. Slide your hand under towel and turn dough over into pot, seam side up; it may look like a mess, but that is OK. Shake pan once or twice if dough is unevenly distributed; it will straighten out as it bakes. Cover with lid and bake 30 minutes, then remove lid and bake another 15 to 30 minutes, until loaf is beautifully browned. Cool on a rack.

Monday, January 08, 2007

Food Porn

Last year, I received a gift subscription to Bon Appetit - food porn deluxe. I've found a few bits of info and some recipes useful, but overall, a magazine about high-brow entertaining (I don't even own a table and chairs, so "tablescape" means nothing to me) and ambitious, restaurant-quality recipes did little more than provide me with pretty pictures of stuff I would never make.

Now I subscribe to Cook's Illustrated, which, without any ads or glossy color-photos, still manages to inspire me to try new things. The best section has tips from readers, packed full of practical and creative kitchen solutions to common problems.

Still, I'm in the market for a second foodie subscription, preferably one with pretty pictures and healthy recipes. Any recommendations?

Saturday, December 23, 2006

PBS Wisdom

A chinese emperor was once asked "Where do you find the best food in the world?" and he replied "I can not answer that, for the finest food can be made in the poorest of homes. If it tastes delicious and brings you great joy, than it is good food."

From "Gourmet's Diary of a Foodie: China- One Billion Foodies"

Friday, December 15, 2006

Roasted Cauliflower


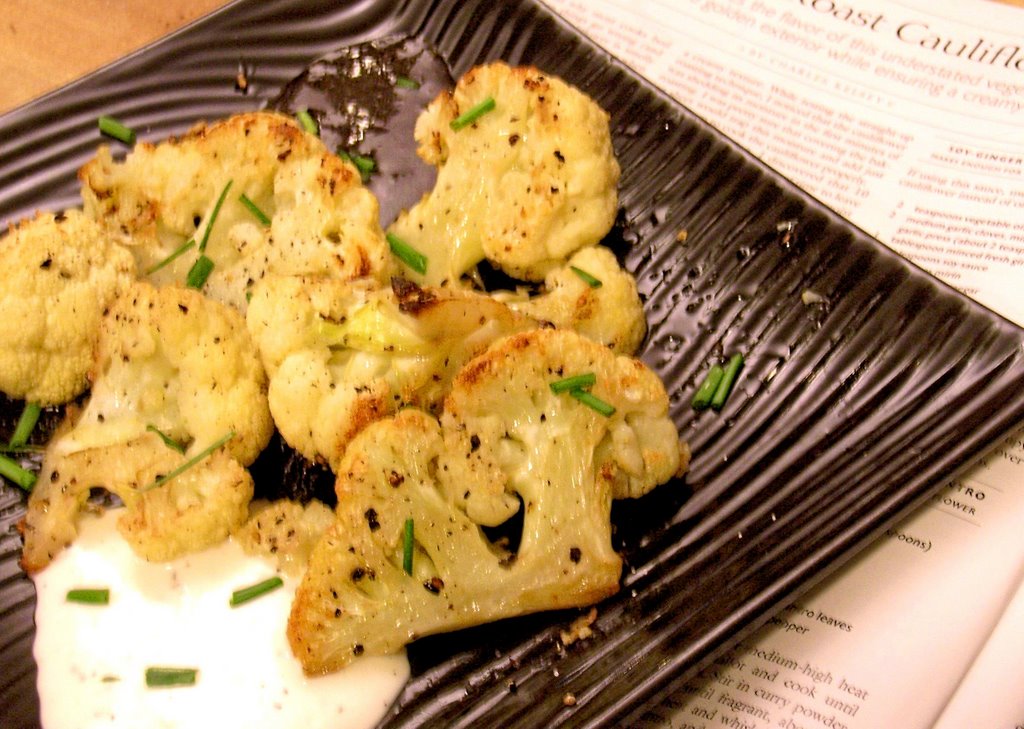
Cauliflower is notoriously healthy, and, in my kitchen, inherently bland. I came across this recipe for roasted cauliflower in Cook's Illustrated magazine, and it has a lot of potential - maybe season with curry powder, or sprinkle with parmesaen cheese after it comes out of the oven. Amazingly enough, the cauliflower was crisp and tender, and great dipped in kung pow sauce or ranch dressing (it's probably delicious with any sauce though!).

You will need -
1 Head of cauliflower
1/4 cup extra-virgin olive oil
salt, ground black pepper

1. Adjust oven rack to lowest position and heat over to 475 degrees. Trim outer leaves of cauliflower and cut stem flush with bottom. Cut head into 8 equal wedges (so florets stay attached to the stem). Place wedges cut side down on foil or parchment-lined rimmed baking sheet. Drizzle with 2 tablespoons oil and sprinkle with salt and pepper - rub to evenly distribute seasoning. Flip cauliflower and season other side with remaining oil, salt, and pepper.

2. Cover baking sheet tightly with foil and cook for 10 minutes. Remove foil and continue to roast until bottoms of cauliflower pieces are golden, 8 to 12 minutes. Remove sheet from oven (this is very imporant...i lost a wedge to gravity and the door when trying to flip the pieces while still in the oven) and using a spatula carefully flip wedges. Return sheet to oven and continue to roast until cauliflower is golden all over, 8 to 12 minutes longer. Season with salt and pepper to taste, serve immediately.

Tuesday, December 12, 2006

potato outrage

Taken from:http://www.phdcomics.com/blog.php

I am annoyed with my favorite cookbook, "The New Best Recipes" from the editors of Cook's Illustrated. Their recipe for scalloped potatoes claims that 1/8 of an inch is the ideal thickness for the potato slices, but it instructs the reader to use a mandolin or a food processor to cut the slices because "you will not be able to slice them thin enough" with a knife.

"Will not"?! Not even a "will probably not" or a "may not"? How dare a cookbook tell me what I can or cannot do? How does it know how well I can handle a knife?

Outraged, I proceeded to slice 5 lbs of potatoes into 1/8-inch thick slices using my trusty Global knife. I totally rocked those potatoes! Take that, cookbook!

Saturday, November 25, 2006

Ciabatta Stuffing with Chestnuts and Pancetta

I made this for thanksgiving this year. Very good indeed.... chestnuts are expensive though.

As taken from the Food NEtwork:

Recipe courtesy Giada De Laurentiis
Show: Everyday Italian
Episode: Italian Thanskgiving


6 tablespoons (3/4 stick) butter
8 ounces pancetta, cut into 1/4-inch dice
2 large onions, finely chopped
2 carrots, peeled and finely chopped
3 celery stalks, finely chopped
2 tablespoons chopped fresh rosemary leaves
3 garlic cloves, chopped
2 (7.4-ounce) jars roasted peeled whole chestnuts, coarsely broken
1/4 cup chopped fresh Italian parsley leaves
1 pound day-old ciabatta bread, cut into 3/4-inch cubes
2/3 cup freshly grated Parmesan
1 cup (or more) canned low-salt chicken broth
Salt and freshly ground black pepper
2 large eggs, beaten to blend

Preheat oven to 350 degrees F.

Butter a 15 by 10 by 2-inch glass baking dish. Melt 2 tablespoons of butter in a heavy large skillet over medium heat. Add the pancetta and saute until crisp and golden, about 10 minutes. Using a slotted spoon, transfer the pancetta to a large bowl. Melt the remaining butter in the same skillet over medium-high heat. Add the onions, carrots, celery, rosemary, and garlic. Saute until the onions are very tender, about 12 minutes. Gently stir in the chestnuts and parsley. Transfer the onion mixture to the large bowl with the pancetta. Add the bread and Parmesan and toss to coat. Add enough broth to the stuffing mixture to moisten. Season the stuffing, to taste, with salt and pepper. Mix in the eggs.

Transfer the stuffing to the prepared dish. Cover with buttered foil, buttered side down, and bake until the stuffing is heated through, about 30 minutes. Uncover and continue baking until the top is crisp and golden, about 15 minutes longer.

Cranberry Margaritas

Could have sworn I posted this last year, but maybe I just sent it in an e-mail to Momo. These margaritas taste delicious, are a beautiful color to behold, and are festive to drink.

6 oz. fresh cranberries
1/2 cup sugar
3/4 cup fresh-squozen lime juice
1 cup cranberry juice
1/2 cup triple sec
3/4 cup tequila
ice
More sugar and cranberry juice

Whirl everything in a blender until smooth. To serve, dip rims of margarita glasses in cranberry juice, then in sugar. Garnish with lime slices and a couple of whole cranberries.

Trader Joe's shoppers, take note: TJ's sells bottled cranberry juice, but it is unsweetened, so I do not recommend it for this recipe. Use OceanSpray or a grocery-store brand of sweetened cran juice.

Tuesday, November 14, 2006

Elephant Stew

To add to the Stuffed Camel recipe posted earlier...

Elephant Stew

Ingredients:

1 elephant
10 warthogs
100 kilograms tomatoes
1000 kilograms potatoes
2 bags onions
100 kilograms salt
1 wheelbarrow onions (heaped)
10 liters vinegar
20 liters chutney
4 guineafowl

Preparation:

Hunt the elephant, warthog and guineafowl. Hang guineafowl to ripen. Cut elephant into edible chunks (will take about a month). Boil the warthog with other ingredients (except guineafowl) till nice and juicy. Now boil elephant chunks over high flames till tender (will take about 4 weeks) and add everything together. Boil for another 5 to 7 days.

Produces about 3,500 helpings.

Note: If the above isn't enough, add the guineafowl as well.

Sunday, November 12, 2006

Whole-wheat Focaccia

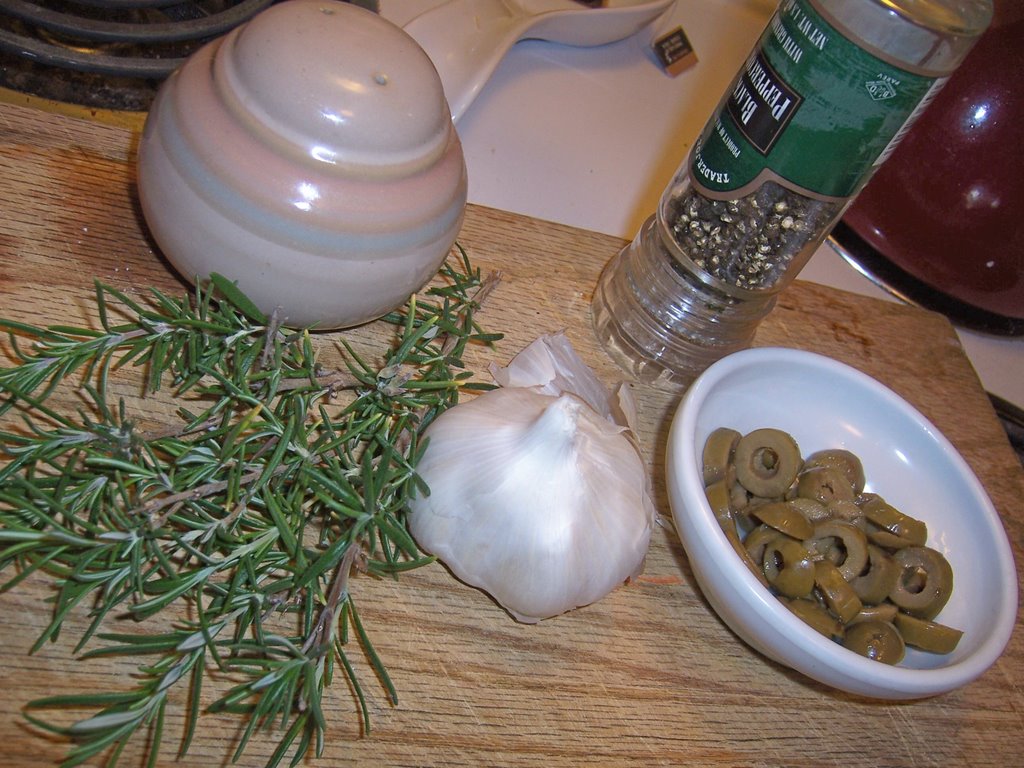
You will need:
3/4 oz fresh yeast, or 1 and a half packets active dry yeast
1 teaspoon sugar
3/4 cup lukewarm water

1 cup unbleached white flour
2 and a half cups whole-wheat flour
2 teaspoons salt
4 tablespoons olive oil (the good stuff if you have it)

4 cloves garlic, sliced in half, then half lenghwise again
chopped fresh rosemary
drained, sliced green olives (any variety you like will work)

To prepare the yeast:

This is not as daunting as it might sound. Place the yeast in a small bowl. Add the sugar and half the lukewarm water and stir carefully until the yeast has dissolved. Set bowl aside for 10-15 minutes, a foam will form on the surface. Stir the yeast again before proceeding to make the dough.

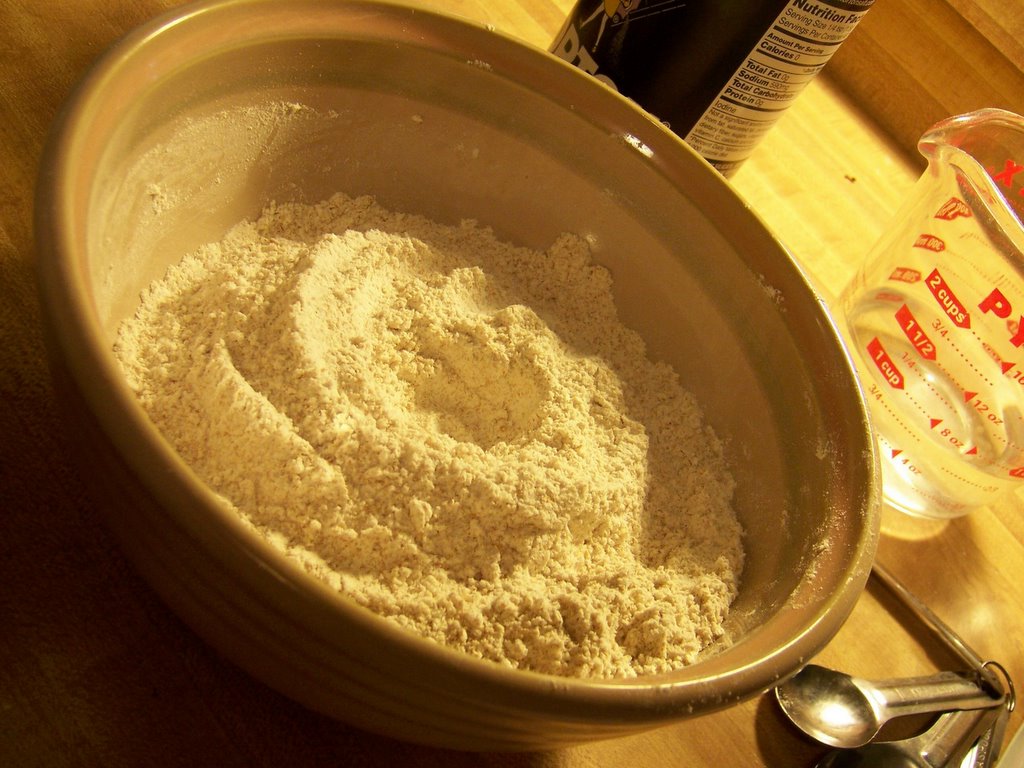
Combine both flours in a large bowl with the salt. Make a hollow in the flour and pour in 3 tablespoons oil, the yeast, and the remaining water. Use a wooden spoon to stir the mixture, until the flour has almost all been absorbed. *Note* Whatever brand whole-wheat flour I am using, seems to have super-absorbtion abilities, and I needed to add extra water, a little at a time, to get most of the dry ingredients incorporated.

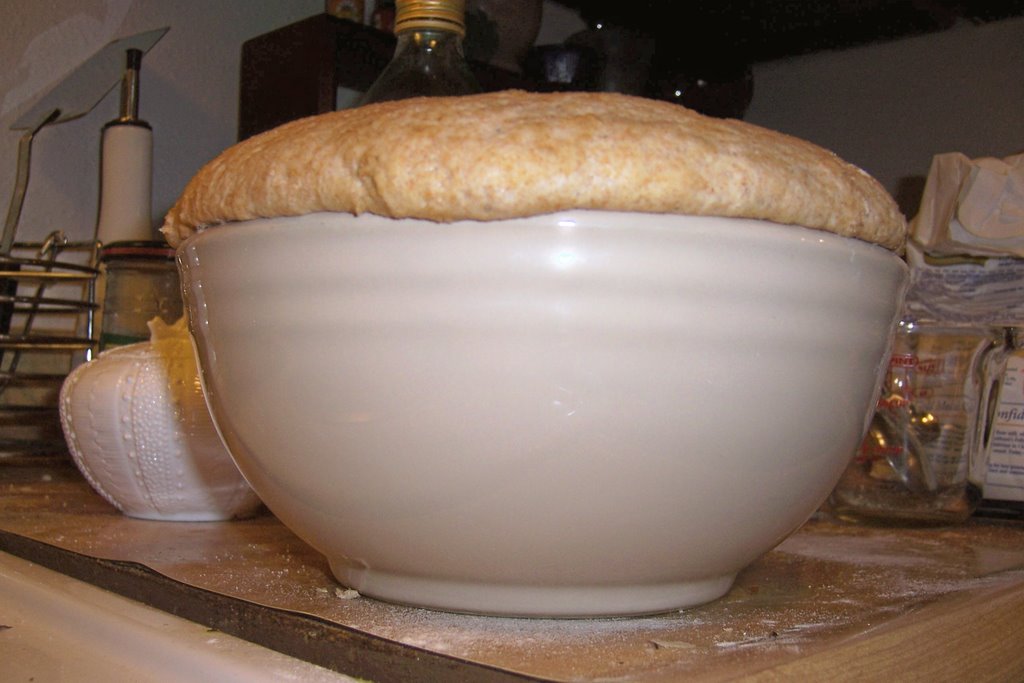
Cover with a dish-towel, and let rise for 1 and a half hours. The bowl I chose wasn't quite big enough, and it started to overflow.

Transfer the dough to a lightly floured work surface, and knead for 2-3 minutes, adding any chopped herbs you'd like.

Place the dough on an oiled baking sheet, and using your hands, spread it into whatever shape strikes your fancy. At first, this might seem futile, as the dough tends to want to pull back into a small ball, rather than stretch to my whim. Keep working - it will eventually obey you.

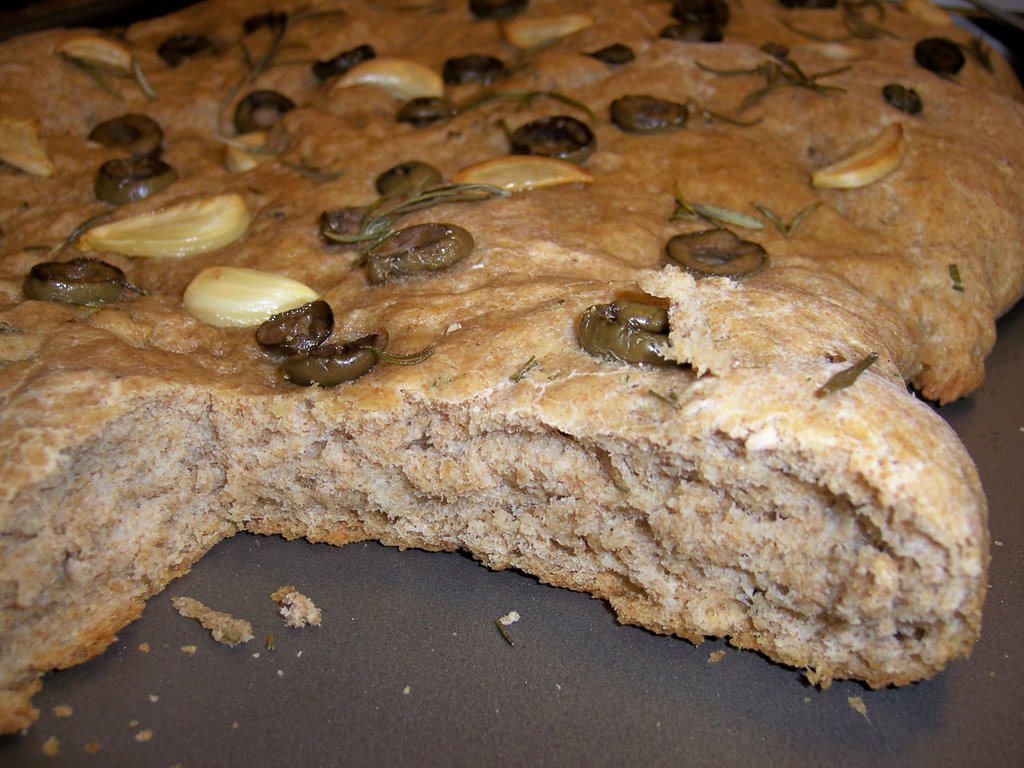
Garnish with anything - I scattered the sliced garlic and olives across the top, and then pressed them in. Sprinkled with some rosemary drizzled with the remaining oil, and it's ready to go into the overn, pre-heated to 400 degrees. Other topping variations include sea salt, sliced green chilies, thinly sliced Fontina cheese, chopped sage, basil etc., sliced red onions, and tomatoes. Bake for about 25 minutes, until top is slightly golden brown.

This is a very hearty focaccia, and seems better sliced open for a sandwich, or dipped into sauce, than on it's own. It toasts beautifully, though some of my toppings were more inclined to fall off the top. Next time, I will be mixing the garlic into the dough, so it's flavor is more pronounced.

Monday, October 30, 2006

Tater Tot Tastic


So I had to go to a potluck on Saturday. I was also house-sitting and was crunched for time. My friend suggested her recipe of TaterTot Casserole, she said she had the ingredients and said I could cook it there. Problem solved! Everyone loved it, except the veggetarians who didn't eat it.

Rebecca's TaterTot Casserole

1 lb ground beef

1 can cream of chicken soup

1 bag of frozen tatertots

shredded cheese

salt, pepper, garlic powder, onion flakes to taste.


Preheat oven 400 degrees.
Cook the beef. Season it until you're happy. Put in the bottom of a pyrex bowl, or casserole dish. Mix in the can of cream of chicken soup and some shredded cheese. Cover with TaterTots until you're satisfied that it's successfully totted. Cover tots with cheese and bake for 35-40 minutes.

Enjoy......... it's good.

Wednesday, September 20, 2006

More Nasty Food from Mo's Kitchen

Without getting into the nitty-gritty details, there were Trader Joe's Lobster Ravioli and an Alfredo sauce for which I had none of the ingredients. It was gross. The End.

Monday, September 04, 2006

Totally Trader Joe's Parmigiana di Melanzane

Trader Joe's has saved my life. That store makes it possible for me to have all the dishes I love to eat but hate to cook. All of the ingredients in this recipe come from TJ's.

Parmigiana di Melanzane

1 box frozen breaded eggplant
1 large can marinara sauce
1 tube cooked polenta, sliced into 1/4" thick rounds
1 1-lb. carton marinated fresh mozzarella cheese
A handful of grated Parmesan cheese
2 eggs
Olive oil

Fry the eggplant and polenta slices in olive oil until lightly browned. In a 9"x13" pan, layer the eggplant slices, half the mozzarella cheese, half the marinara sauce, the polenta slices, the other half of mozzarella cheese, the other half of the sauce. In a separate bowl, beat the eggs well and mix in the Parmesan cheese. Pour that mixture over the eggplant assembly. Bake at 350F for 30 minutes. Cool for 10-15 minutes before eating.

Thursday, August 24, 2006

Why I Love Making Baklava

If you remember in my last Baklava post, I talked about how pouring the honey mixture was the best part, tonight I took video.

yay!


Photo Sharing - Upload Video - Video Sharing

Wednesday, August 23, 2006

Leftover Salmon and veggies


Toast two slices dark, hearty bread. Mash up leftover salmon with mayo and pepper, spread on one slice of bread. A dollop of mayo smeared on the other slice of bread, then layer roasted veggies. Add fresh herbage as you like (I went for garlic chives) and eat furtively so that no one else can ask for a bite. This is not a meal I ever want to share. :p

Tuesday, August 22, 2006

Clean Out the Pantry Chicken

Faced with low supplies, low funds and extreme laziness, my dinner options were somewhat limited this evening. Here is what I had on hand:
Packet of Saffron Rice
can of RoTel
Can of Tomato soup (condensed)
Frozen TJ's chicken
Can of kidney beans

Here is what I did:
Put rice in rice cooker.
Dump RoTel, about 1/2 the condensed soup, chicken and spices in a pot. Boiled on medium until rice was done. Added kidney beans (rinsed) to chicken pot, then dumped the rice in, too. Mixed and served.
I think its good. SPICY AS CRAP! But good.

Saturday, July 15, 2006

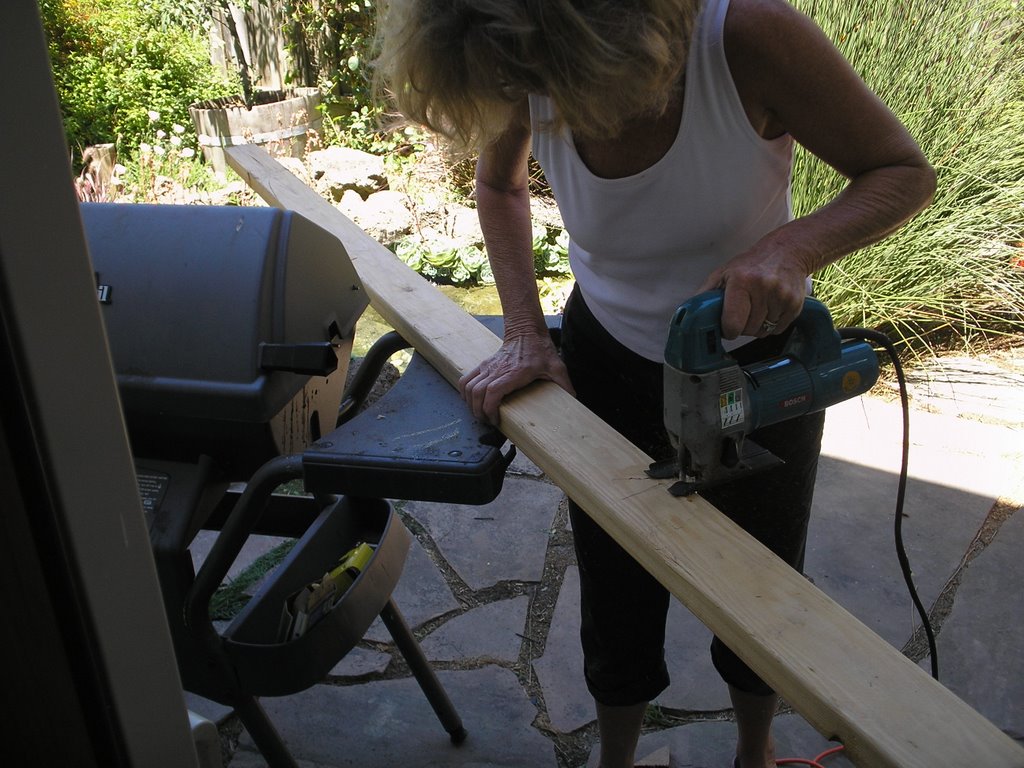
Barbie the builder


If you have nothing to barbeque, you can always build a boat.


These are my lottery winnings. I won these wineglasses in a radio sweepstakes, although I suspect no one else entered.

Wednesday, July 05, 2006

Snacks

Popcorn is now officially my favorite snack.


I love popcorn.

Thursday, June 08, 2006

Frankenstein Kitchen

So, I dont know about you, but in MY kitchen, there are certain appliances that need to...well...to be loved a little extra.

One example for me: my Rice Cooker. My rice cooker is the single most used appliance in my kitchen. However, it has an annoying habit of spitting rice water ALL OVER the kitchen through the little vent hole. The solution? See for yourself.
Yes, thats the top to a cocktail shaker.

What are your genius riggings? (Lulette's Peg Leg Barbie was pretty good)

Friday, May 26, 2006

Least dirty dishes possible


So let's say every last dish you own is dirty in the sink, and you're not in the mood. But you're dying for a warm, comforting, nutritious meal.


Put some water on to boil (tea pot works just fine), take the last bowl out of the cupboard. Rinse and rip to bite-size pieces some baby bok choy, or other leafy greens (chard, spinach, anything in the family of foliage that is good cooked). Put greens in bottom of bowl, cover in boiling water. Stir with chopsticks for a minute or two. Pour in packet of miso soup, stir, enjoy.

Wednesday, May 24, 2006

UnPesto

So, in classic Otis fashion, I knew what I wanted for dinner (Pesto), but had none of the key ingredients, namely Basil and Pine Nuts. Or even Parmesean for that matter. But, as I have learned from my mother, I had two things in my favor:
1. Plenty of sexy power tools and trusty hand tools.
2. A blonde's obliviousness to obstacles.

So, what did I have?
Green leaves: check! (spinach)
Nuts: check! (chopped walnuts)
Cheese: check! (some hard italian cheese that resembles parmesean)

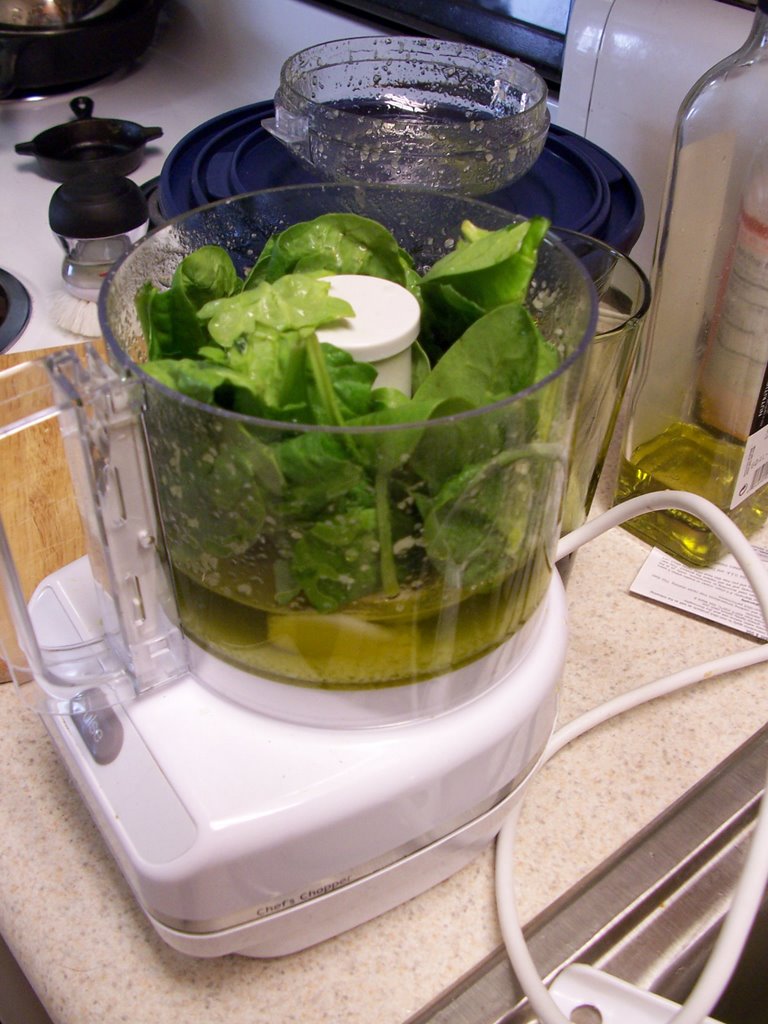
HA! It's ON! The Cheese was in a huge chunk, and because I'm lazy and resourceful and have sexy power tools, I just threw the whole lump into the mini-prep. I was on the phone with Laurel. She described the sounds "like you are mini-prepping your cat!" I told her I would call her back when the shrieking subsided.


So the lump finally broke down into smaller pieces, and I added garlic, spinach and EVOO. See the layers? Like an Ogre. Or Parfait.

Then I dumped on the nuts, and WHIIIIRRR!!!! UNPESTO! Pairs well with Gorgonzola Walnut Tortellini from Trader Joes. I also added some cooked chicken I had laying around.

Sunday, May 21, 2006

Seasonal goodness

I've been recieving a gift subscription to Bon Appetit for nearly 6 months now, and everytime a new issue arrives in the mail I can't help squealing "food porn!" with glee. There are loads of recipes in there I'm not quite ambitious enough to try, but almost without fail, there are a few recipes in very issue that suit my kitchen and cooking sensibilities just fine.

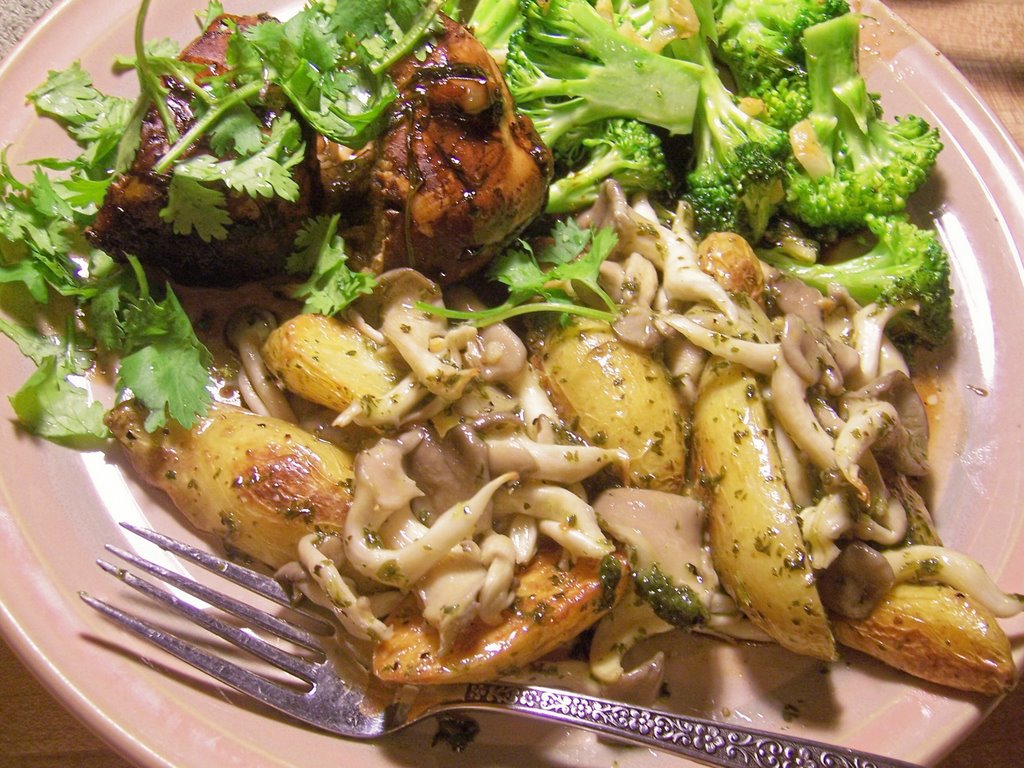
This month it made my day to find a recipe for Fingerling Potatoes with Oyster Mushrooms - I'd just been to Farmer's market and bought a pound of wee little potatoes, and the asian market down the street is a weekly stop for mushrooms and miso.

This recipe was easy, simple, and I imagine it would go well with just about any slab o' animal and veggies. I rounded out this particular meal with chicken cooked in a soy sauce/balsamic vinegar/garlic/cinnamon/sugar mix (ala Joy of Cooking) and some broccoli cooked in olive oil and garlic.


Fingerling Potatoes with Oyster Mushrooms

(makes 6 servings)

7 tablespoons extra-virgin olive oil, divided
2 pounds small yellow fingerling potatoes, unpeeled, halved lengthwise (i left the smallest ones intact)
4 tablespoons minced shallots, divided
1 garlic clove, pressed
1 pound large fresh oyster mushrooms, torn into inch-wide strips
1 tablespoon chopped italian parsley

Position 1 rack in top third and 1 rack in bottom third of oven and preheat to 450F. Brush 2 large rimmed baking sheets with 1 tablespoon olive oil each. Place potatoes on 1 prepared sheet, drizzle 3 tablespoons olive oil over and toss to coat. Spread potatoes in single layer, sprinkle with salt and pepper. Place potatoes on top rack of oven and roast 10 minutes. Sprinkle half of the garlic and shallots over. Transfer potatoes to bottom rack of oven and continue to roast until tender and golden brown, stirring occasionally, about 10 minutes longer. Remove from oven.

Meanwhile, toss mushrooms on second prepared baking sheet with remaining 2 tablespoons olive oil, sprinkle with salt, pepper, and remaining garlic and shallots. Spread in single layer and roast mushrooms on top rack of oven until golden brown, stirring occasionally, about 15 minutes. Add mushrooms to potatoes, stir to combine. Add parsley to potato-mushroom mixture, season to taste with salt and pepper and serve.

Saturday, May 20, 2006

Must Love Butter

So, I may have posted about Baklava before, but I have made it several times in the last couple weeks, and so I am posting about it again. I like it because it easy, its good, and EVERYONE ALWAYS raves about it. I, of course, never tell anyone that the secret ingredient is enough butter to kill a horse, but what's a heart attack amoung friends?

Baklava:
1 lb Filo (phyllo) dough. Found in the freezer section of the grocery store.
a LOT of butter. I have used anywhere between 2-4 sticks. (.5-1 lb)
Nuts. I prefer walnuts, D prefers almonds. I like the bitterness of the walnuts. So I say walnuts.
Cinnamon.
Water
1 C sugar
1/2 C honey
Vanilla

If you remember ahead of time, pull the Filo out of the freezer and put it in the fridge a day or two before you make it. Filo dough will stay good for about 4 weeks in the fridge, and indefinitely in the freezer. If you DON'T remember, let it thaw for a couple hours on the counter.

Butter the bottom of a 9x13 pan. Melt a couple sticks of butter. In a chopper, blend the nuts (I use about 6-8 oz.) with cinnamon (uh...I just dump some in). Place nearby. GENTLY lift two sheets of the Filo and place it in the bottom of the pan. For the first few layers at the bottom, you may need to trim the ends off, it will be too long. Just use a sharp knife. Using a paintbrush-looking thing, butter the top of the Filo dough. Place 2 more sheets, butter and repeat.

When you are about 8 sheets deep (sheets. that mean about 4 rotations of layer and butter), dump a couple of tablespoons of the nut mixture onto the Filo. Spread it around so its evenly covering the Filo, then go back to the dough and the butter routine. I usually end up doing about 8 sheets, nuts, 8 sheets, nuts, 8 sheets, nuts and then 6-8 more sheets. Make sure you THUROUGHLY butter the top layer.

Now comes the hardest part of the whole adventure...cutting the baklava into square or diamonds. I guess the easiest way to do it is to cut about 4 sections lengthwise, and then diagonally across from there. It's a giant pain in the butt, and I have yet to find a way to do it that is any easier or faster than what I've done before. So, good luck with that.

After you have managed to cut that thing into a couple dozen pieces, put it in a 350* oven for 40-50 minutes. I find its usually done at 40. 25 minutes before the Baklava is going to come out of the oven, mix 1C sugar into 1C water on the stove. When the mix starts to boil, add the honey and a splash of vanilla. Let this simmer for about 20 minutes, until the baklava comes out the oven.

Now this is my favorite part!!! When the Baklava comes out of the oven, immediately pour the water/sugar/honey mix over the baklava. It bubble! It steams! It makes neat sounds! I love it!

Let the baklava cool a bit. If you are eating it at home, just get pieces from the pan. If you are taking it to a potluck or something, its far easier to put the pieces into those paper muffin cups. When storing baklava don't store it in an airtight container, or the fridge. The fridge makes it hard, and the airtight makes it soggy. Enjoy the baklava and the compliments!!

Friday, May 19, 2006

Suburban Barbie


Grandpa failed to see the charm of Buccaneer Barbie with its squeegee pegleg, so he bought us a brand new CharBroil. Some assembly required, and then it rained. I was too lazy to go to the store for dinner, so instead of a fabulous steak barbeque, the menu tonight consisted of beans and lettuce. There's always tomorrow, Mr. CharBroil!

Thursday, May 18, 2006

Impromptu Pasta

Impromptu Pasta with sausage veggie sauce, garlic bread and caprese salad.

ingredients -

garlic
1 yellow onion
2 zucchinis
3-4 tomatoes
5 Italian sausages - basil and garlic- from Trader Joe's
fresh basil
fresh whole wheat pasta (or use any kind of pasta you like)
1-2 balls of fresh mozzarella (probably like fist sized ones)
1 jar of trader joe's basil and garlic marinara sauce - or really any kind you like
1/2 cube of butter
olive oil
loaf of whole wheat bread

Turn the oven on 350 to preheat. Turn your frying pan on med heat and heat up. Drop a tablespoon of olive oil in the pan. When the pan is warm toss in the sausage. Cook until brown on all sides and no longer pink in the middle. Probably like 10-15 minutes. While the sausages are cooking get to prepping for the rest of the sauce.

Pull off about 15 basil leaves from stems and wash them, and set aside.
slice your remainder tomatoes for the caprese salad. I turn my tomatoes on the side and slice them width-wise or whatever you call it - into pretty good size slices. Put them on a plate.

slice the mozzarella balls into thick circles as well and place on top of the tomato slices
place 1-2 basil leaves on each tomato-mozzarella stack. Drizzle with olive oil and salt and pepper lightly
Place in fridge to chill

slice the bread - or if its already sliced, put it on a cookie sheet and set aside.

get a small sauce pan and put the 1/2 cube of butter in it on low low heat. We will add garlic to this and cook for a while and eventually put on the bread for it's garlic sauce

Okay dice three cloves of garlic (half for the garlic bread and half for the sauce)
dice half of one yellow onion -
dice one tomato for the sauce
Dice a handful of washed basil
set aside. If you want you can put the garlic and onion in one bowl and the tomato, zucchini and basil in another

When the sausage is almost done put a pot of water on to boil for the pasta. Obviously depending on what kind of pasta you used depends on how long it will take to cook. Fresh pasta only takes a few minutes.

Check your melty butter. If its melted - add the remainder of your set aside garlic and let that cook on low for a while. The house should start smelling good. Open up a bottle of wine and pour yourself a cup. Enjoy.

When the sausage is finished remove it from the pan but leave the drippings Take the sausage and Chunk it. I mean, slice it into thick chunks--, add the garlic and onions to the sausage drippings and brown - return the sausage to the pan, add zucchini, tomato and sauce and then simmer

Check your melted garlic butter sauce. If the garlic smells good and has had a chance to cook for a while, spoon it over your bread and put it in the oven for about 10 minutes.

When the sauce has simmered and the zucchini has cooked so its tender, and your pasta is done cooking, drain the pasta and mix with the sauce. Turn your oven on broil for about a minute to get that garlic bread crispy- but watch that it doesn't burn.

Serve pasta, take out that caprese salad, give everyone some garlic bread and pour yourself another glass of wine.
Enjoy

Tuesday, May 02, 2006

Grapes and Turkey

Last night I was feeling tired, lazy, and fat. I even debated whether or not I should bother eating dinner at all. I decided on eating what looked good and that I could grab. I had a bunch of fantastic green, seedless grapes and then I ate a few slices of Roasted Turkey From Trader Joe's It was good. Alright so it wasn't "cooking" and it certainly wasn't anything fancy, but I ate it while watching Seinfeld (The Cadillac: PartI). Everytime I eat grapes it makes me think of the ancient Romans. Or that time I was taking a summer school class at CSUMB, well it was really at Moss Landing and we got to eat during our final. As I was writing and reading and thinking, I was mushing up a raisin between my fingers. Before that day, although I knew that raisins came from grapes, I couldn't ever see how. They just looked too different. Like Arnold Schwartzenneger and Danny DeVito in the movie Twins. Okay this is supposed to be about food. Did you know that grapes and microwave can be used as entertainment?

Saturday, April 22, 2006

PanaderĂ­a

So, in Costa Rica, bakeries are the place to be. Actually, they are the makers of heavenly food. They make cakes, pastries, bread, and things filled with meat. I have compiled a list of the best things to buy if you ever decide to come to Costa Rica and go to a bakery.

1. Torta Chilena-this is layers of the flaky pastry stuff with caramel between the layers.

2. Lucrecia-a crouissant filled with jalapeño, toasted cheese, ground beef, and onions.

3. Enchilada-also a crouissant filled with potatos, something spicy, and ground beef.

4. Pudding-not real pudding, but it's got the texture of pudding and is really good.

5. Tres Leches-the best thing in the history of the world. It is a normal cakes soaked in sweetened condensed milk, evaporated milk, and regular milk. Hence the name, Tres Leches.

That's it. There are tons more but these are the ones to look for.

Wednesday, April 19, 2006

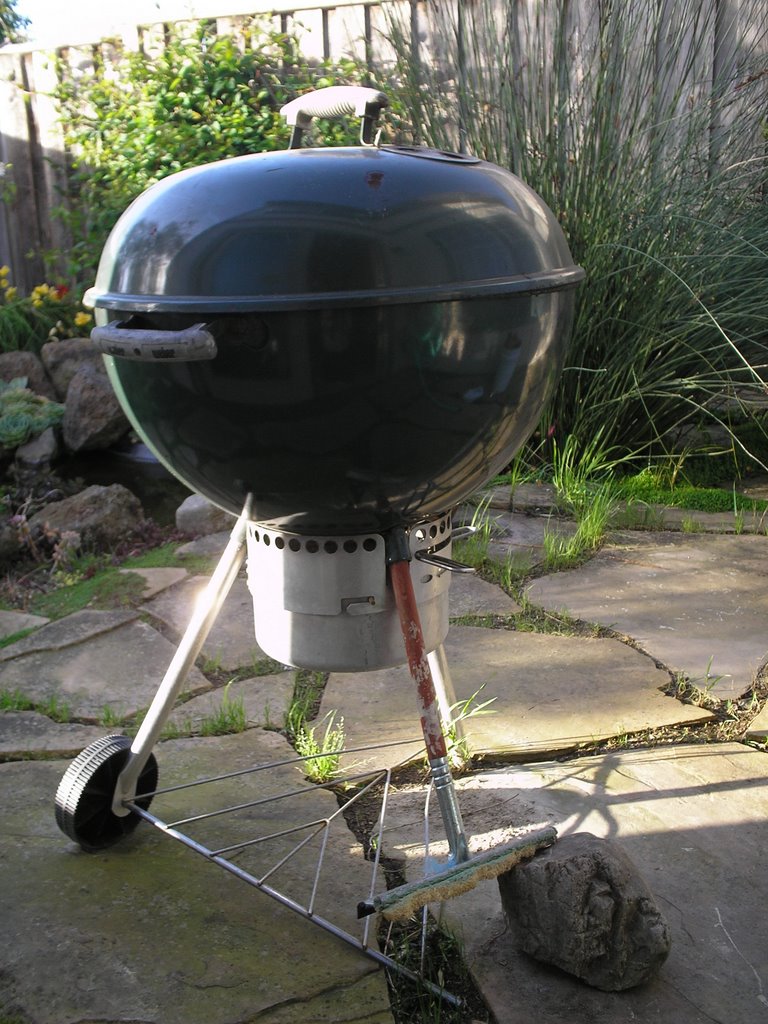
Buccaneer Barbie


This barbie does windows AND shrimp.

Sunday, April 16, 2006

Easter S'mores

We had a barbeque at the house saturday night, and decided to conclude the evening with s'mores roasted over the 'que. We went to the corner store and picked up graham crackers and hersheys bars, but when we got to the marshmallow isle found nothing but wee lil' mallows. Feelin' a tad defeated and more than a little desperate, we walked slowly back up to the checkout line. Along the way we passed the Easter stuff, and lo-and-behold! PEEPS! Those pink and yellow bunnies and chicks..made from...MARSHMALLOWS!! DING DING DING!

Friday, March 31, 2006

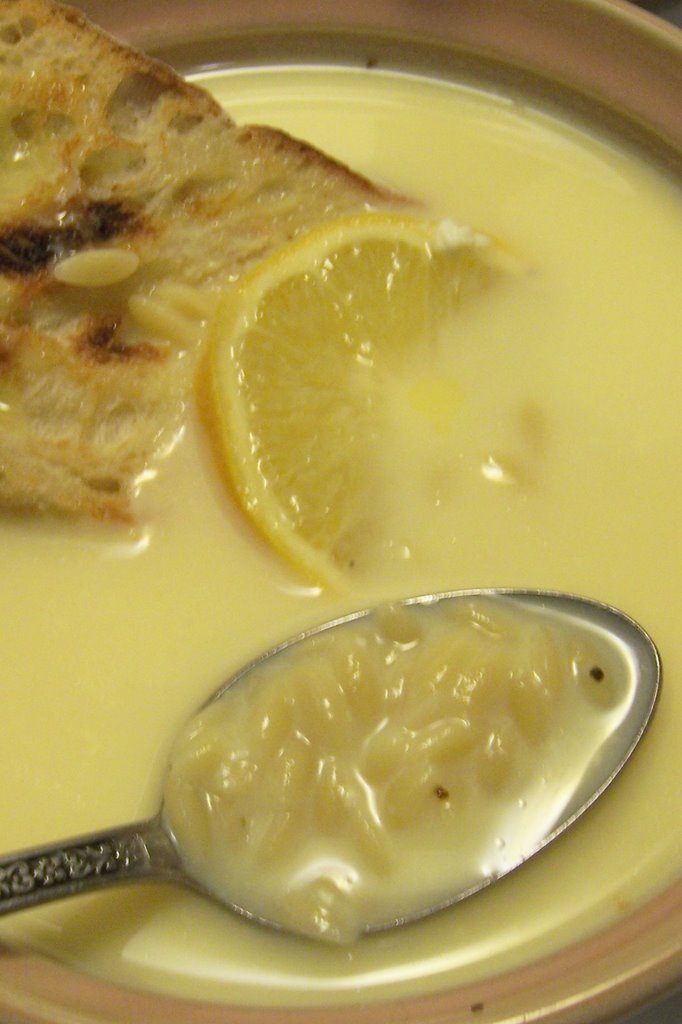
Avgolemono (heaven in a bowl)


I remember this soup from childhood, and my mother used to make it with rice instead of orzo. Quick, easy, simple comfort food.

You'll need...

7 1/2 cups chicken stock
1/2 cup orzo pasta
3 eggs
juice of one large lemon
salt and ground black pepper

Pour the stock into a large pan and bring to a boil. Add the pasta and cook for 5 minutes.

Beat the eggs until frothy, then add the lemon juice and a tablespoon of cold water. Slowly stir in a ladleful of the hot chicken stock, then add one or two more. Return this mixture to the pan, off the heat, and stir well. Season with salt and pepper and serve immediately. (Do not let the soup boil once the eggs have been added or it will curdle. Leftovers, if you have any, will keep for a few days). Slice of toast, or maybe garnish some fresh chopped herbs - this soup is as good in summer as it is in winter.

Sunday, March 05, 2006

Sunday Morning Fabulousness


Good Morning
Originally uploaded by Allmightymo.
It's been over six months since Dominic left, and there are certain habits I have adopted. For example, I have not eaten off of a non-disposable plate in my own house in well over a month. I try to reduce my dish-doing even more by drinking straight from the milk carton (if it weren't asking for disaster, I would drink water straight from my Brita pitcher, too). And I am indecisive. This morning I went to Dunkin' Donuts and ordered a small cup of coffee, and then couldn't decide if I wanted a chocolate cake, sour cream, or jelly donut. So I ordered all three, came home, busted out the Leche and put my donuts on a paper plate (it would be plain lazy to eat them out of the bag). I the proceeded to take alternating bites out of the three donuts while drinking my milk and coffee. What is your sunday morning fabulousness?

Thursday, March 02, 2006

You Can Play With Your Food

Commentary by Lore Sjöberg
02:00 AM Mar, 01, 2006 EST


Last week, we took a look at the wonderful ways in which technology has improved our food without making it healthier or better tasting. This week, we're doing more of the same, starting with a product that will delight people who wish their toaster waffles more closely resembled plastic toys.

Lego Eggos
It's an obvious idea in retrospect. Not a great idea, but an obvious one: Combine Eggo waffles with Lego-brand-building toys that will cause people to send you annoying mail if you call them Legos. Each waffle is scored into six pieces, each of which is shaped vaguely like a Lego brick. The box suggests you "toast, break and build!" But each waffle is a highly processed rectangle of pure disappointment. The top of each "brick" has eight studs that look, honestly, like meerkat nipples. The bottom has three holes. Just three. You can't build. You can just kind of stack. Heap, really. It's so depressing. I'm going back to bed.

Downside: Will make you sad for the rest of your life.

Hidden Key Lucky Charms
The "hidden key" here refers to certain specially endowed marshmallows. Before you pour milk on them, these marshmallows have vaguely key-shaped dents in them. After you pour milk on them, they have vaguely key-shaped holes in them. Astonishing! Technically speaking, though, it's not really a hidden key, it's a hidden inverse key. Presumably you use the marshmallow as a mold. Pour some molten steel in there, let it cool, and you have an actual tiny key. Which you then use to, I dunno, go through Lucky the Leprechaun's porn drawer or something.

Downside: Clearly, magic like this can only be the result of a pact with Satan.

Scooby-Doo Tattoos Fruit Roll-Rups
The "Rups" is because it's Scooby-Doo, and, you know, Scooby-Doo puts "r" at the beginning of his words. And they let him design the box. Or something. Anyhow, I have at this moment a vaguely rectangular blob of blue on my tongue. It was supposed to be a picture of a bone saying "Rooby Rocks," but it turns out that bumpy, slimy surfaces are not the best place to transfer sharp, intricate images. Maybe I did it wrong, but this blue crap doesn't come off easy and I only have so much tongue. I'd be disappointed, but you know, I didn't really want a cartoon dog bone slogan in my mouth today.

Downside: Pretty much all downside. Hard to find an upside, really.

Easy Writer Food Decorators
Everyone likes cupcakes and cakes with interesting decorations in the frosting! If you don't, then everyone but you likes them. The problem with traditional frosting decoration is that it requires you to clench a little tube, which everyone hates. OK, everyone but you. Well, clench no more! These are like little brush-pens full of food coloring. With a little patience, you can draw the design of your choice on the cupcake of your choice, provided said cupcake has white frosting. They actually work pretty nicely. They don't make the food taste bad, or different for that matter. Finally, a food product that doesn't disappoint. Good going, Ms. Crocker!

Downside: Do you really want to draw carefully on two dozen cupcakes?

Sunsweet Ones
Why is it that people don't eat more prunes? Is it that they taste kind of musty-sweet gross? Is it that they have the texture of a buttered slug? No, no, no. No! It's because you don't have to work hard enough to eat them. When you're able to reach into a sack of prunes and just pull one out, you don't appreciate the treasure lying flaccid in your palm. That's why these prunes are individually wrapped. Once you've experienced the labor involved in unwrapping every single prune you eat, you'll treasure every syrupy, mucilaginous bite.

Downside: Prunes.

Sunday, February 19, 2006

Chapatis and hummus

I had plans to do hummus and pita bread, but being the prepared person that I'm not, I forgot yeast. So, I've found a simple substitute for the pita, Chapatis bread - an Indian staple. The hummus recipe yields 3 times as much as you can buy in the average container for a fraction of the cost. I've added rosemary and extra garlic as a way to spice up the basic recipe, but you can flavor your hummus to your own preferences!

For the Chapatis you'll need...

2 cups chapati flour or ground whole wheat flour
1/2 tsp salt
3/4 cup of water


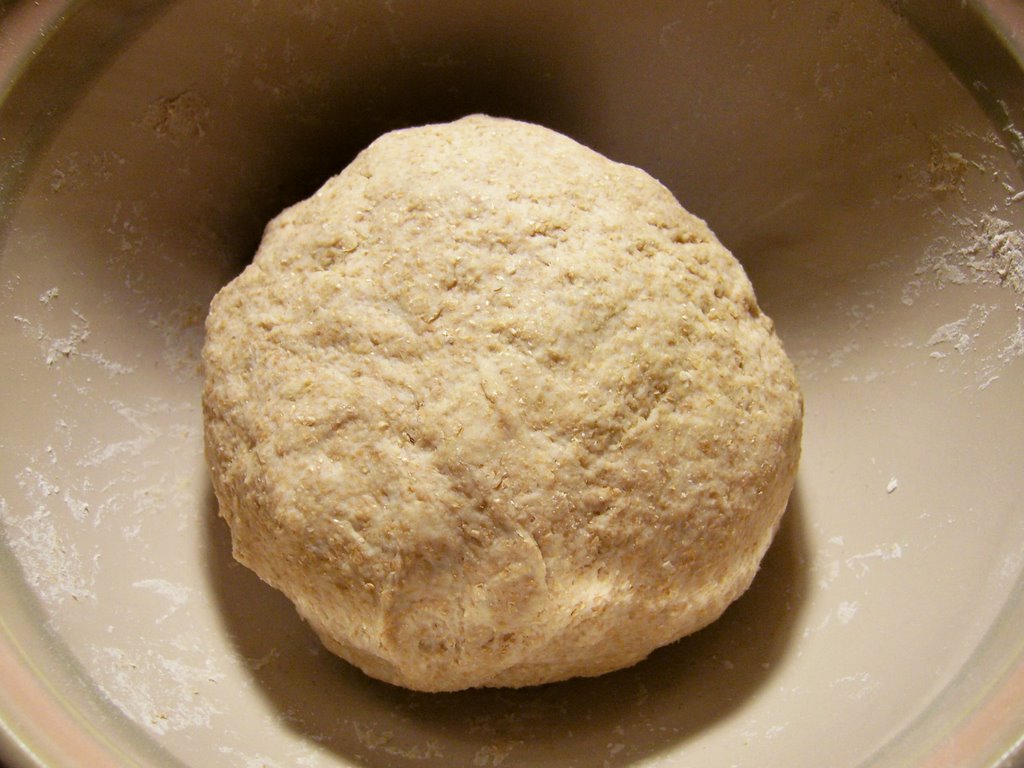
Place the flour and salt in a mixing bowl. Make a well in the middle and gradually stir in the water, mixing well with your fingers. Form a supple dough and knead for 7-10 minutes. Ideally, coverwith clear film and leave on one side for 15-20 minutes to rest.


Divide the dough into 8-10 equal parts. Roll out each portion in circle on a well-floured surface.


Place a heavy frying pan over high heat. When steam rises from it, lower the heat to medium and add the first chapati to the pan.

When the chapati begins to bubble turn it over. Press down with a clean dish towel or a flat spoon (I used a spatula) and turn once again. You might need to experiment a bit to get your bubbles to the desired golden brown.

Remove the cooked chapati from the pan and keep warm (piled up between two plates works, or foil and parchment paper) while you finish the rest.

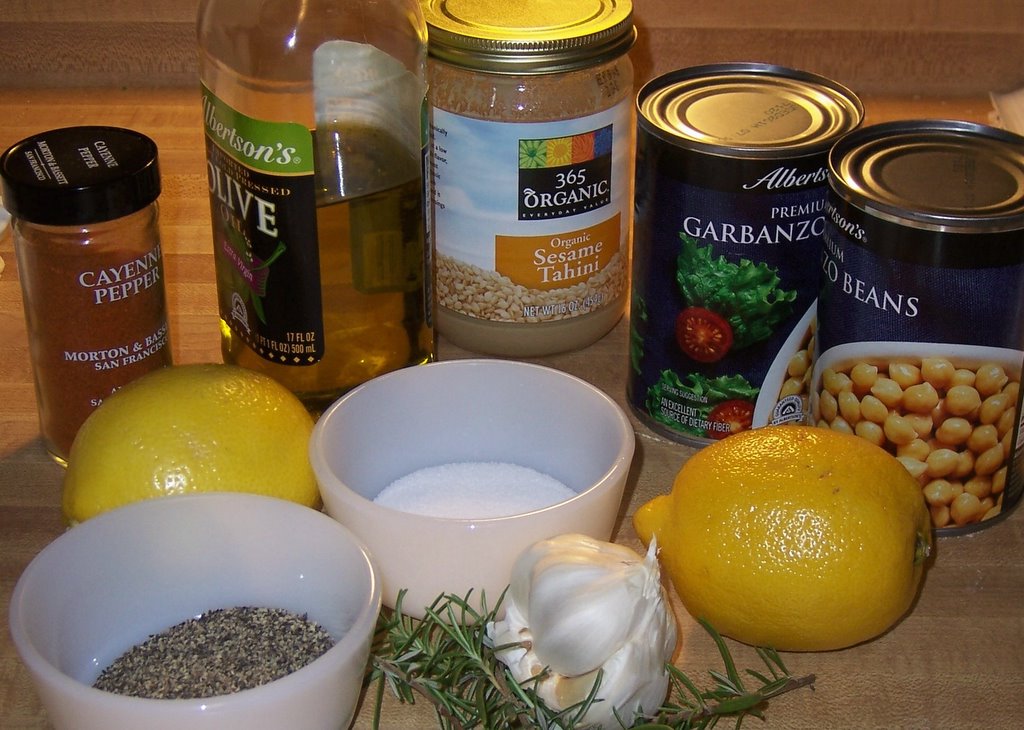
For the hummus, you'll need...

3/4 cup dried chickpeas or two 14 ounce cans, well drained
juice of two lemons
2 (or more, to taste) garlic cloves
2 tablespoons olive oil
pinch of cayenne pepper
2/3 cup tahini paste
salt and ground black pepper (to taste)
extra olive oil and cayenne pepper for garnish

I've also included rosemary in my batch, though most fresh herbs would work. Parsley is a common seasoning and garnish as well.

If using dried chickpeas, put in a bowl with plenty of cold water and soak overnight. Drain and cover with fresh water in a saucepan. Bring to a boil and boil rapidly for 10 minutes. Reduce the heat and simmer gently for about 1 hour until soft. Drain.


If you're using canned chickpeas, skip all that. Drain and process the chickpeas in a food processor to a smooth puree. Add the lemon juice, garlic, olive oil, cayenne pepper and tahini and blend until creamy, scraping the mixture down from the sides of the bowl.

Season the puree with salt and pepper and transfer to a serving dish. Sprinkle with olive oil and cayenne pepper. Grab pile of warm chapatis and devour!

Friday, February 10, 2006

Cookbook Love and the Swordfish Fiasco

The current issue of the New Yorker magazine (Feb. 13 & 20, 2006, the anniversary issue) contains a funny article about cookbooks, by Nora Ephron. Here is an excerpt:

"Thanks to 'The Gourmet Cookbook,' my mother herself was in the kitchen, whipping up Chinese eggrolls from scratch...The recipe doesn't begin to convey how stressful and time-consuming an endeavor it is to make eggrolls, nor does it begin to suggest how much tension a person can create in a household by serving eggrolls that take hours to make and are not nearly as good as Chinese takeout."

There are a few other good articles in this issue, too, on subjects other than food and cooking. I highly recommend it. Get some of that good Chinese takeout and read a magazine tonight instead of cooking dinner!

That is exactly what I should have done tonight. Instead, I got ambitious and decided to try something new: Let's have grilled swordfish! I wanted to celebrate the sunny, 75-degree dead of winter here in California. The swordfish was awful. I don't know if it had gone bad, or if it was just bad-tasting fish, but the minute I tasted it I lost my appetite and didn't eat anything for dinner. Best to stick with the tried and true: grilled salmon, or better yet, raw hamburger.

If the swordfish wasn't bad enough, I made a dessert that flopped, too. It was cherry cobbler from a mix. You'd think it would be hard to blow it with a mix, but I did a good job of it. It looked fine coming out of the oven, nice and brown on top, but the biscuit topping was runny underneath. I remembered that's why I never make cobbler because that always happens. Stick with the tried and true: ice cream.

Wednesday, February 08, 2006

Things I love at Trader Joe's

The following have become staples in my kitchen. They are currently saving my life;

1. whole wheat pitas. They are good for everything. I use them for sandwhiches, I eat them with hummus, I make them into mini pizzas. They form the basis of my breakfast wrap. They taste good with melted cheese. They are great.

2. Pastry wrapped Brie. This is what I eat when I want to have a hurting stomach the next day. Note - I am lactose intolerant but trying to convince myself that I am not. I love brie. I love baked brie wrapped in pastry dough. It's in the cheese section. It's heaven.

3. Frozen - precooked brown rice. It's in a box, in the frozen section, it comes with three packages of rice each serving 2 people. It takes three minutes to cook in the microwave. PERFECT rice every time. Note my rice problems in past posts.

4. Pirate's Booty. Reminds me of the cheese puff I used to eat as a kid, but healthier and franky, anything with the word Pirate and Booty in the title is good for me.

5. Just Chicken and Just Salmon. It's amazing, it's cheap, it's pre-cooked and ready to eat. I use the chicken and put it in a toasted pita in the morning with some melted chedder. The chicken is also good in sandwhiches or salads. I need quick protein fixes in a big way so it helps out. I haven't tried the salmon yet but i bought it and am looking forward to it.

-----

It's been a while and I forgot about this post. I tried the Salmon, it scared me, but I wasn't sure how long it was good for.

I love everything at TJs

Nasty Chicken and Rice

I've been lazy. I've been busy. I've been eating out a lot. I certainly have not been cooking, but recently decided to cook the chicken in the fridge. Chicken and brown rice, mmmm good. Note - this recipe bombed. NOT, was "the bomb", just - bomb. Awful. Don't try this at home.

I didn't have a lot to go with the chicken so I tossed in about 6 ice cubes that were made of lemon juice (they were in the freezer). I then COVERED the chicken breasts with lemon pepper and some salt. I let cook. Eventually the lemon ice cubes melted, and then I added some water. I cooked the chicken covered. I looked in the freezer again and saw some frozen pineapple pieces. I tossed those in. Everything cooked down. Chicken was finished. I put the frozen TJs rice in the microwave for three minutes and ate it.

My eyes watered and my mouth burned. I totally over lemoned and over peppered that damn chicken. It was a classic case of SPICE OVERLOAD. What a shame.

What should I have done differently? (obviously used LESS.....)

Tuesday, February 07, 2006

Just what the doctor ordered


It's been one of those weeks. By Tuesday night, therapy is needed. Brownies (from a box) and a couple glasses of 2002 Shiraz. Yes, I bought it for the label, which gives no information about the product in the bottle but insists that emus are, indeed, insane. Not great (bargain buy at the supermarket), but it'll do the trick, and I still won't do the dishes.

Wednesday, February 01, 2006

Ravioli Nudi

Men come up with some great recipes, and what could be more typical male than a nudi recipe? Let's open a nudi bar in downtown Petaluma. That should boost the economy.

This recipe comes from Mark Bittman of the New York Times. He says that nudi is the Italian name for pasta stuffing that is served outside of the pasta because the cook got lazy when it came time to stuff.

Ravioli Nudi

1/2 pound each veal and pork, or other ground meats
1 egg
1/4 cup Parmesan cheese
1/4 cup fresh parsley
1/4 cup minced onion
Salt and pepper
1 pound fresh or dried pasta
4 Tb butter
20 sage leaves (if you have only 19, forget it)

In a bowl, combine meat with egg, cheese, parsley, onion, salt and pepper. Mix well. Form into balls 1/2-inch in diameter. Refrigerate until ready to cook.

Bring a large pot of water to boil and salt it. Cook meatballs in water for 5 minutes; remove with slotted spoon and keep warm. Cook pasta in the same water until tender.

Meanwhile, in a medium pot cook butter and sage together until butter is light brown, about 5 minutes.

Before draining pasta, reserve a bit of its cooking water. Drain pasta, toss with butter-sage mixture and enough reserved water to make it saucy. Top with meatballs and serve with Parmesan.

Heaven on a bun

My new, beautiful, stock-pot arrived this past week, and not having enough chicken carcasses to make stock, it was decided to inagurate the pot with some lobster. This recipe comes from the January 2006 issue of Bon Appetit.

1-2 pound live lobster
1/2 cup finely chopped celery
1/4 cup mayo
2 teaspoons fresh lemon juice
3 tablespoons butter
2 high-quality hot dog buns (straight sided)
chopped fresh chives

Plunge lobster into large pot of boiling water; cover and cook for 9 minutes. I had two smaller lobsters, both fit just fine in the pot after being inspected by the very concerned cats. Using tongs, transfer lobster to large bowl of ice water to cool quickly. Twist tail and claws from lobster body; discard body. Crack claws, remove meat, pull apart and remove cartilage. Using kitchen shears, cut tail in half lengthwise, remove meat. Cut claw and tail meat into 3/4 inch pieces, transfer to medium bowl.

Add chopped celery (neither B. or I like celery, so I substituted green onions), mayonnaise, and lemon juice to lobster and mix until blended. Now, I got the measurement for lemon juice and butter mixed up. After draining off a bit of the excess once I realized my mistake, I added a touch extra mayo to compensate. Surprisingly (or not) the more lemony flavor was just fine, especially with the green onions. (this part can be prepared 4 hours ahead. cover and refrigerate)

Melt butter in large nonstick skillet over medium heat. Add buns and cook until golden brown on all sides, turning often, about 5 minutes. (this is KEY...it made the meal truly decadent). Cut lengthwise slit in top center of each bun, pry open. Divide lobster mixture between buns, sprinkle with chives and serve.

(devour, no pause for pictures...sorry...too good!)

"Ok, so my life doesn't suck, but I am lazy" Leftovers.

Take leftover salmon fillet from last night. Mash with mayo in container you saved it in. If you horribly oversalted it when you cooked it, like I did, don't worry about salt and pepper. If you cooked it to be edible, consider salt and pepper. Toss in a bit of curry powder. Toast some bread, I used sourdough. Make a sandwich, and eat it over the sink, thus negating the need for dishes. Drink wine straight from bottle.

Thank you Allison, for the suggestion.

Tuesday, January 31, 2006

"My Life Sucks" Salmon

There has been more drama in the past 24 hours than I would have liked. I came home emotionally and physically drained, and hungry. Yesterday I had pulled some salmon from the fridge and put it in the fridge to defrost. Knowing full well that I needed to cook the salmon, but having neither the patience, nor the materials to make another recipe I had in mind, I turned to my trusty BHG Cookbook, looking for something under the "fish and shellfish" tab.
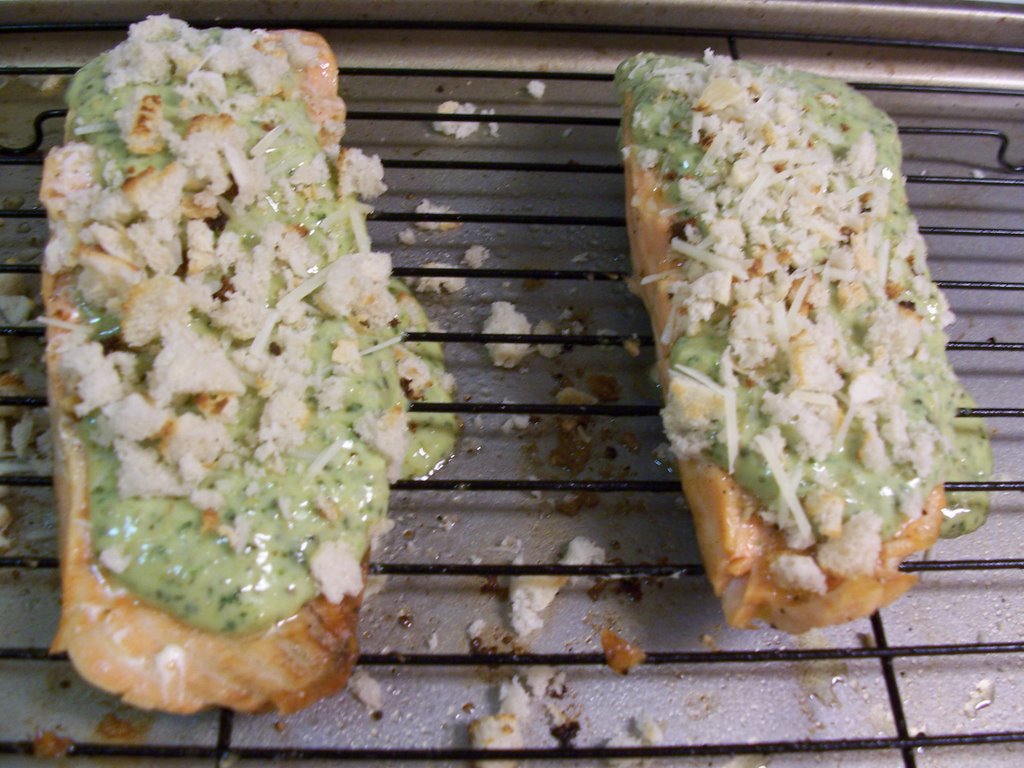
Lo and behold, pesto something-or-other salmon. The biggest thing in its favor--ease of preparation. I washed and dried my salmon (ok, why?). I brushed it with a little EVOO, salt and pepper, and broiled it for about 7 minutes 4 inches from the heat source (4-6 min per half inch fillet [julia child pronounces it Fill-Ett]), or until it flaked easily with a fork.

While its doing that, mix together some pesto and mayonnaise in a bowl. In another bowl, mix together bread crumbs and parmesean cheese.

Pull the salmon out of the oven, dump the pesto on top, and the bread crumbs on top of that. Broil for another 1-2 minutes, and eat it. If you feel like it, make a side dish. I dumped spring greens and Soy Vay Cha-Cha Chinese Chicken Salad Dressing together on the side.

Good, easy, fast.

Saturday, January 28, 2006

Restaurant Week

This week was restaurant week in Downtown Norfolk. Bailey and I went to dinner with a few friends at a relatively new restuarant called Vintage Kitchen. Check out the menu. I chose the mac and cheese, tuna and apple pie.
Each course was better than the next. The first course: macaroni noodles with parmeseano reggano, aged cheddar, truffle oil and shaved truffle. It was creamy and delicious and had a nice bite to it. I inhaled it.
The second course: Sashimi grade tuna, cooked rare, with green beans, asparagus and sweet potato. Ohhhh....so good.....It melted in my mouth. Phenomenal. Gone in minutes.
Dessert: A small apple pie on phyllo dough, with a dallop of amazing, clo-like vanilla ice cream. The pastery was flakey and delicious, the apples were done perfectly, and it was excellent ice cream. I chowed down.

It was an amazing meal, and coupled with a good bottle of one, and for one flat price it couldn't be beat. I look forward to future restuarant weeks in downtown.

Sunday, January 22, 2006

Spaetzle


I love German food. This is because I lived there, and I grew accoustom to it. None the less whilst shopping at Cost Plus World Market for napkin rings, I stumbled upon a box of Spaetzle. I love Spaetzle. I cooked it and then once the noodles were cooked I fried them in butter and added them to sauteed veggies (zuchinni, carrots onions and green beans) and some ground turkey. This is what I ate for dinner last night. HMmm good. Tonight -- I had left overs so I decided to toast a whole wheat pita. I smothered the inside with hummus, added some cheddar cheese and heated up the mixture from last night. I ate two half pita sandwhiches. IT WAS GOOD.

I need to look up my own spaetzle recipe though because in the end - it wasn't.... I mean. It was OK - but it wasn't that great. I'll have to make it from scratch though.

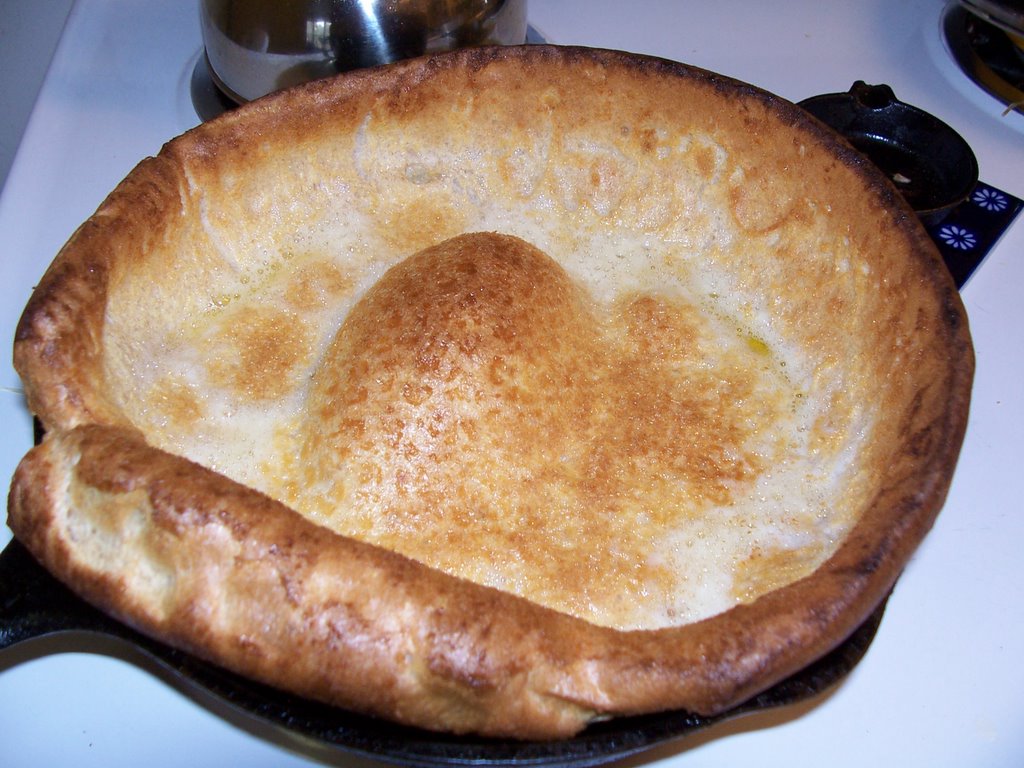
Sombrero with a side of Pears, please!

Dutch Babies for Breakfast:


Preheat oven to 400.
Put 2 TBS butter into a cast iron skillet, or other oven going pan (OGP). Put the pan in the oven. While the butter is melting (3-5 minutes) whisk together 3 eggs. Add 1/2 c. milk, 1/2 cup flour and some salt. Beat together. Immediately pour into OGP, and stick back in the oven for 20-25 minutes until well done.


While the Dutch baby is cooking, prepare some sort of fruit. I had a bunch of pears, so I sliced those up, drizzled a little honey on them and mixed them with a little bit of raspberry preserves. I heated the whole thing up in a skillet, and just as the dutch baby came out of the oven, I dumped the fruit on top. Serve with something cold and white. The recipe recommends whipped cream, all I had was vanilla yogurt.

Saturday, January 21, 2006

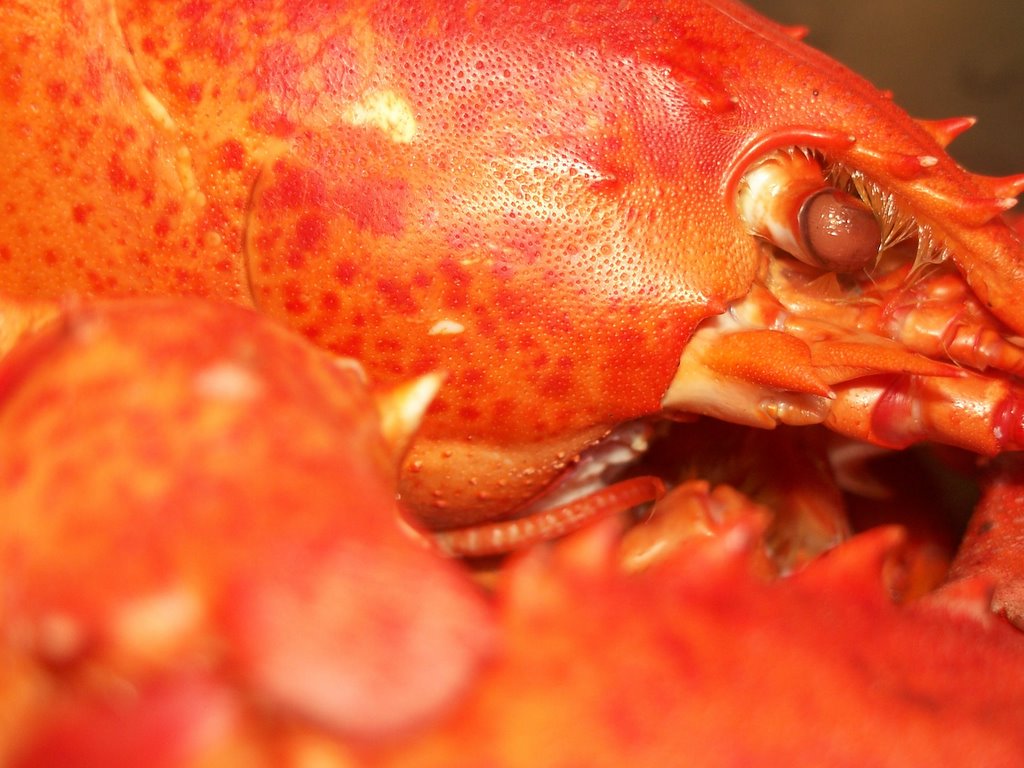
Momo-Killer of Crustaceans


I had lobster for dinner tonight.


It was awesome.


Death Chamber.


Ready to eat.

Thursday, January 19, 2006

Casualties in the Kitchen

So, for those of you who have followed my posts throughout the day, you will remember that I had raspberry muffins for breakfast.


Sadly, due to a wee forgetfulness on my part (i.e. totally forgetting they were in the oven when I turned on the broiler), they are no longer.

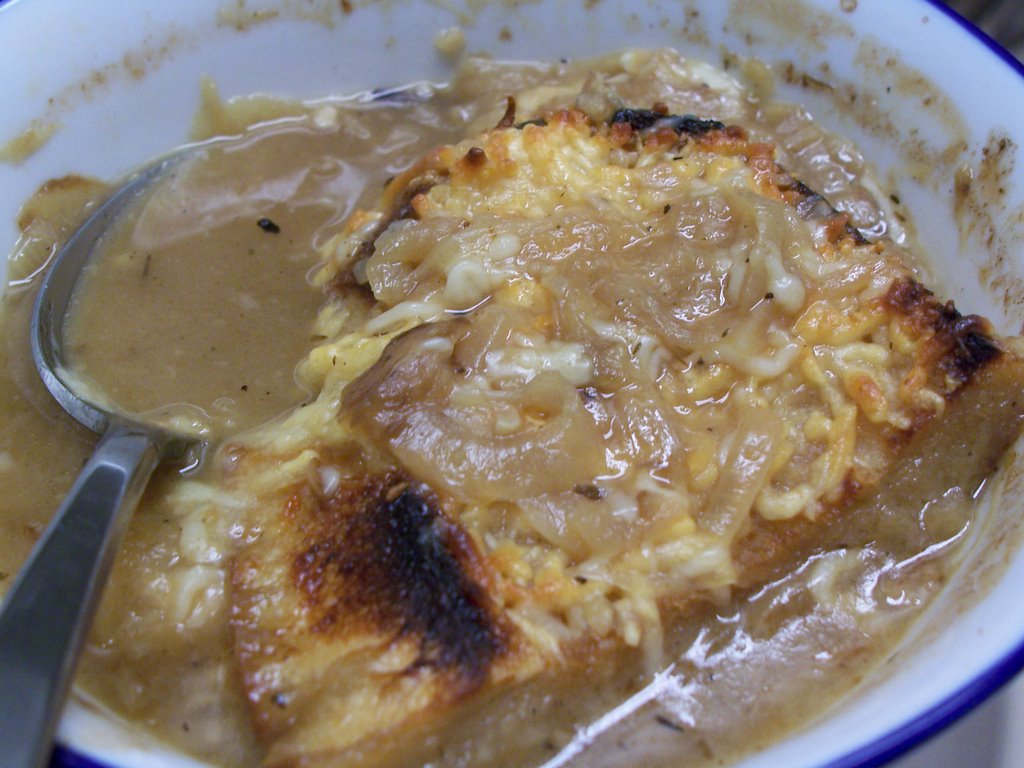
Le French Onion Soup

See, I have made zee french onion suup, ok?

I make the onions small, like so: and in a pan, I made zem brown with zee butter and zee olive oil (dirty italians). After zey have been made brown, I add garleek and thyme and sugar. Well. Zee recipe calls for sugar, I had le honey.

So, ok, le onions are le browning, and zee recipe calls for beef stock. I do not have le beef stock. Zen I remember! Sacreblue! I have zee leftover gobblestock from zee...what do you call... le Thanksgiving. Frozen. In le freezer. Le Crap.

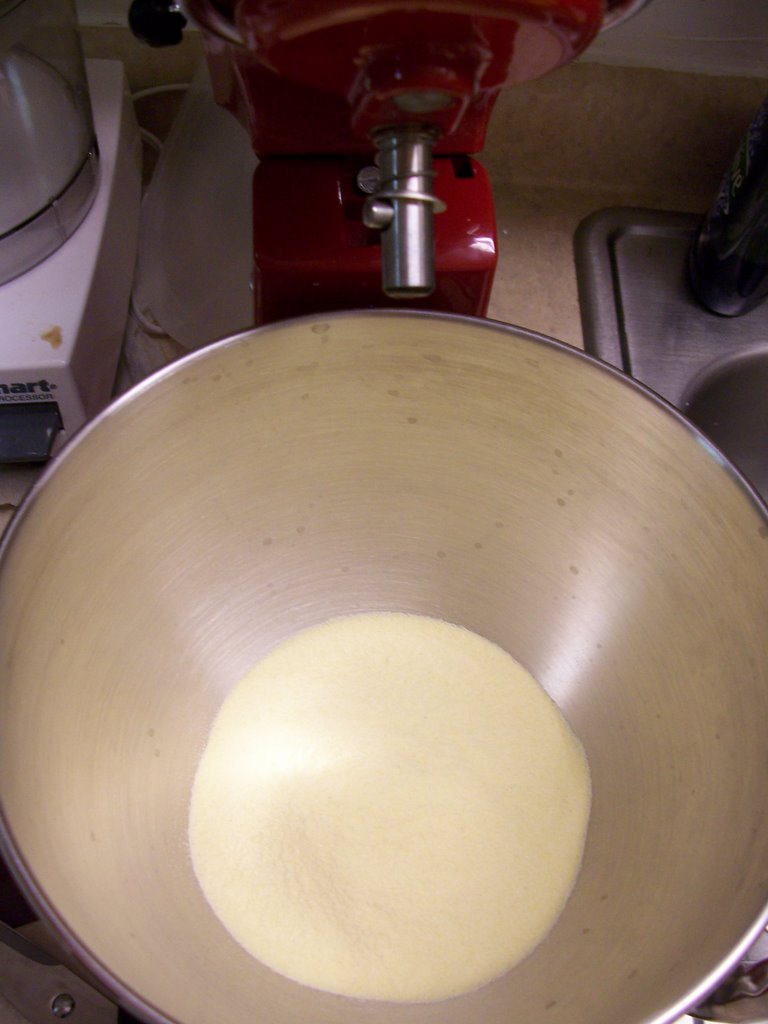
So I dump le frozen block of gobblejuice into le big pot, and turn on le burner in hopes that it returns to its liquid state before le onions burn. Zen I remember I need to add some fleur to le onions. Can't find le fleur. Add le Semolina. Same thing. Heehee.

Eventually I get all le pieces together and WALA! LE FRENCH ONION SOUP! (except instead of le french bread, I use le sourdough. And zee only fromage that I have is le parmesean.)

MWA! Bon Apetit!

Breffest

For breakfast today:

Mini muffins (i got a muffin mix and mini muffin pan as a christmas gift from extended family).
Side O' Butter
Side O' Blackberry Preserves

Glass O' Milk

Wednesday, January 18, 2006

MSGood

So, I know there are several people here who love MSG. I'd long been under the impression that it was some terrible cancer-causing indulgence that made snack foods so damn good. Turns out, it's more about Umami than anything else. You even have tastebuds specific to detecting glutamate...so lick those finegrs after you've devoured your favorite MSG laden snack!

Tuesday, January 17, 2006

Stupid

No one has posted anything in the last 13 days. This leads me to believe either 1 of 2 things.

1. Everyone on the list of posters has been eating out every meal since January 4th (I know I have - just ask me what I had for lunch today)

2. Everyone is dead.


I know 2 isn't true.............

So I will entertain you with Stupid Recipes that I have located on the Internets:

BUTTER MELTS
take a piece of butter and stick it in the oven at 50 degrees celcius and enjoy,

Sunless Tea

INGREDIENTS:
3 tea bags with strings
hot water
1 bottle
1 refrigerator

In light of today's diet awareness, we present this handy recipe, which,
though not earthshaking, provides a refreshing thing to reach for when
checking to see if the refrigerator light still operates.
Take a glass half-gallon bottle, like what apple juice comes in at the market.
Fill the bottle with hot tap water. (Don't get fussy and boil it or anything.)
Take three tea bags of anything, twist the strings together, push the bags into
the bottle, and screw the lid on so the strings stick out. (Don't let the tea bag
companies give you that bugle juice about ten tea bags per gallon. You
yourself may one day have children to put through college as they apparently
do.) Place the jar on the counter for about fifteen minutes, then take the tea
bags out. When the jar is cool enough so it doesn't melt the plastic shelf in
your refrigerator, put the jar in the frig.
You can make this tea with cold water and just put it in the frig, and this
works, but with hot water you can watch the tea leach out of the bags, form
little tea tendrils, drift down and form a gradient at the bottom of the bottle.
(If you often spend time observing such things, you should probably either get
a hobby or become a government worker.)

And this is not actually a recipe - but hysterical -
"The moral of the story is don’t get married when you’re 15 and strippers named Bobbi don’t know a damned thing about making fried chicken." as taken from a blog called Kat's Kitchen

Wednesday, January 04, 2006

I HAVE MADE PASTA!

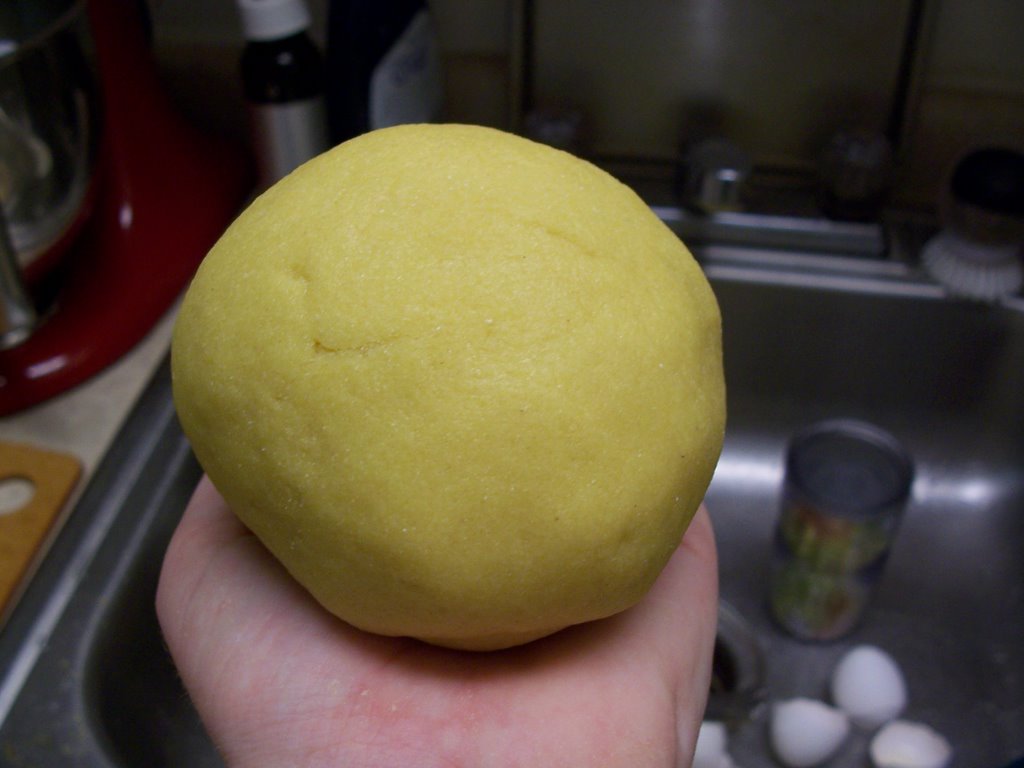
It was a lot easier than I expected it to be, although I have to admit that I screwed up the first ball of dough.

If you have a mixer, put 1.5 cups semolina flour into the mixer. On top, add 2 eggs beaten with 2 tbsp water and 2 tbsp olive oil. If you are doing this by hand, make a mountain out of the flour, and put the mixture in the middle, like a volcano, and beat in the flour a bit at a time with a fork.

Once you have an elastic ball that doesn't stick to anything but itself, let it rest in a plastic bag for about 20 minutes.

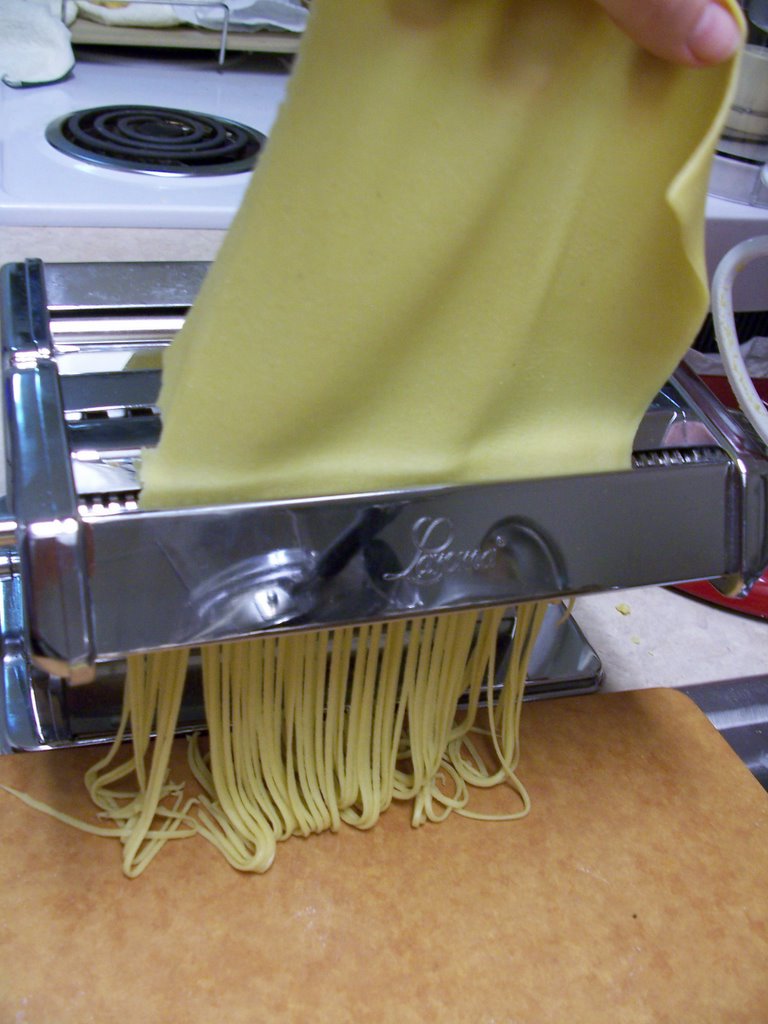
Now, if you don't have a super sexy pasta machine, just roll out the dough to desired thickness and cut with a knife into whatever shapes.

If you DO have a super sexy pasta machine, roll the pasta, SUCKAS!!


And if you don't have a pasta drying rack, use what's on hand!