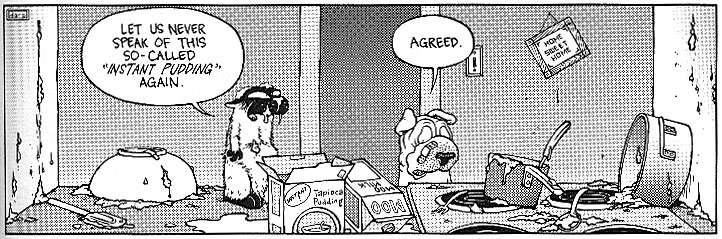
THE PUDDING INCIDENT

What have you been up to in the kitchen?
Showing posts with label baking. Show all posts

Saturday, February 07, 2009

Breakfast on a Lazy Saturday


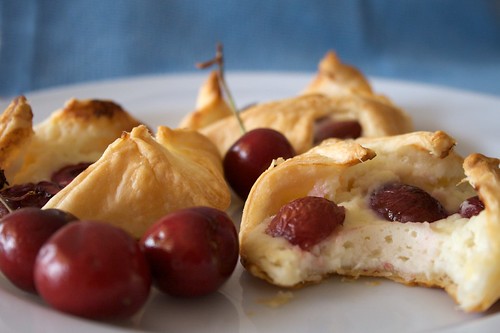
D worked last night, so I got up at 7 and picked him up from the fuels branch. I then came home and promptly went back to sleep. At some point, he came in and went to bed. He'll be out till 4 or 5 this afternoon. I got up around 10, took Diesel for a walk, and then came home and stared in my fridge for a while, trying to decide what to eat. I grabbed the dough with the spanish wrapper that I could only hope was puff pastry, a half empty tub of ricotta cheese, and some cherries. I unrolled the dough, cut it into squares, and let it start to come to room temp. I mixed the ricotta with some powdered sugar, lemon juice and zest and a dash of salt. I then sliced and pitted the cherries. Spooning the ricotta into the squares of pastry, and adding a couple of cherry halves, I pinched them up into little packets, and threw them in the oven at 400 for what eventually turned into something between 20 and 30 minutes. They were so much tastier than I could've hoped! I enjoyed them with a cup of coffee and some milk.

Sunday, November 30, 2008

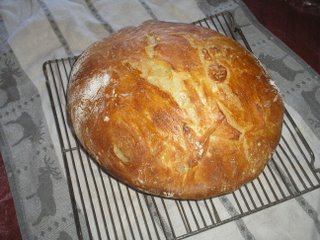
Speeding the No Knead Bread

From my Mom, who got it from Press Democrat


Makes 1 big loaf

Time: About 1 hour, plus 4½ hours' resting

3 cups bread flour

1 packet (¼ ounce) instant yeast

1½ teaspoons salt

-- Oil as needed

1. Combine flour, yeast and salt in a large bowl. Add 1½ cups water and stir until blended; dough will be shaggy. Cover bowl with plastic wrap. Let dough rest about 4 hours at warm room temperature, about 70 degrees.

2. Lightly oil a work surface and place dough on it; fold it over on itself once or twice. Cover loosely with plastic wrap and let rest 30 minutes more.

3. At least a half-hour before dough is ready, heat oven to 450 degrees. Put a 6- to 8-quart heavy covered pot (cast iron, enamel, Pyrex or ceramic) in oven as it heats. When dough is ready, carefully remove pot from oven. Slide your hand under dough and put it into pot, seam side up. Shake pan once or twice if dough is unevenly distributed; it will straighten out as it bakes.

4. Cover with lid and bake 30 minutes, then remove lid and bake another 15 to 30 minutes, until loaf is beautifully browned. Cool on a rack.
Sunday, August 17, 2008

Kitchen notes

I have made both of the following recipes in the last 24 hours, and both are excellent.

Zucchini-Chocolate Chip Muffins

INGREDIENTS

  • 1 1/2 cups all-purpose flour
  • 3/4 cup sugar
  • 1 teaspoon baking soda
  • 1 teaspoon ground cinnamon
  • 1/2 teaspoon salt
  • 1 egg, lightly beaten
  • 1/2 cup vegetable oil
  • 1/4 cup milk
  • 1 tablespoon lemon juice
  • 1 teaspoon vanilla extract
  • 1 cup shredded zucchini
  • 1/4 cup miniature semisweet chocolate chips
  • 1/4 cup chopped walnuts

DIRECTIONS

  1. In a bowl, combine flour, sugar, baking soda, cinnamon and salt. Combine the egg, oil, milk, lemon juice and vanilla; mix well. Stir into dry ingredients just until moistened. Fold in zucchini, chocolate chips and walnuts. Fill greased or paper-lined muffin cups two-thirds full. Bake at 350 degrees F for 20-25 minutes or until muffins test done.

FIVE MINUTE ICE-CREAM


INGREDIENTS

  • 1 (10 ounce) package frozen sliced strawberries
  • 1/2 cup sugar
  • 2/3 cup heavy cream

DIRECTIONS

  1. Combine the frozen strawberries and sugar in a food processor or blender. Process until the fruit is roughly chopped. With the processor running, slowly pour in the heavy cream until fully incorporated. Serve immediately, or freeze for up to one week.

Wednesday, May 28, 2008

Mini Margarita Pies

1 pkg Refrigerated Sugar Cookie Dough (Pillsbury or Nestle break and bake 20 count)
1 pkg cream cheese
1/3 cup sugar
1 or 2 limes
8 oz container of cool whip
Pretzels (optional)
Strawberries (Optional for garnish)

Cut each of the dough cookies in half. Roll into a ball and place in Mini Muffin Pan. Press with floured Mini Tart Shaper (or something that will form them into little pie crusts). Bake cookies at 375 for 10-12 minutes or until golden brown. Remove from oven and cool for about 1 minute, then REPRESS because they will start to collapse.
Remove from Pan to Cooling Rack. Meanwhile, combined softened cream cheese with powdered sugar. Zest lime. Cut lime in half and press with Citrus Press. (Add both limes if you prefer lots of lime flavor!) Mix it all together. Add in Cool Whip. Pipe filling into cups however you can get it in there. If desired, add chopped pretzels to cup before filling (to add a bit of salty flavor), OR stick a pretzel stick into each cup. Garnish with strawberry slice if desired

Monday, July 23, 2007

Summer Tart

This was my first foray in the world of tarts, and it was actually far easier than expected. I did learn one thing for certain - when mixing recipes, as I did with the use of a crust recipe from one source and the filling from another - make sure both are adjusted to fit the same size pan. I made slightly more filling than needed, and it did not set quite as expected. Even with some ingredient substitutions, this recipe was simple and delicious.


For the crust:
(recipe from: The Food Lover's Guide to Paris, July 1999)

8 tbls unsalted butter, melted and cooled
1/2 cup sugar
1/2 teaspoon pure vanilla extract
1/2 teaspoon fine sea salt
1 cup plus 1 tbls unbleached all-purpose flour
1/4 cup almond meal for flour

4 tbls finely ground unblanched almonds

Preheat oven to 350 F

Butter (or don't - it seems to work out fine either way) the bottom and sides of a 9-inch fluted tart pan with removable bottom. Set aside.

In a large bowl, combine the melted butter and the sugar, and using a wooden spoon, stir to blend. Add the remaining ingredients and stir to form soft cookie-like dough. Transfer the dough to the center of the buttered pan. Using the tips of your fingers, evenly press the pastry along the bottom and up the sides of the pan. The pastry will be quite thin.

Place the pan in the center of the oven and bake until the dough is slightly puffy and set, 12 to 15 minutes. Sprinkle the ground almonds over the bottom of the crust. (This will help prevent the crust from becoming soggy. I had no ground almonds, so I used a light dusting of the almond meal flour with mixed results.)

For the filling:
(recipe from: Eric Kayser's Sweet and Savory Tarts)

Keep in mind these measurements are for a larger pan than the crust recipe - rectangular 12 x 18 inch or round 10-inch - or one could make more crust and use the bigger pan...

2 lb plums (or any other fruit - the cinnamon seasoning of this tart goes well with all the stone-fruit I tried)
3 eggs
1 1/4 cups granulated sugar
1 cup ground almonds (didn't have this, used some of the almond meal, but not a whole cup. probably why it did not set as hoped)
1 tbls ground cinnamon, and a little more for decoration
1/2 cup whipping cream
3 tbls unsalted butter, melted

Preheat the oven to 325 F (after the crust is done)

Wash and dry the plums. Cut in two and remove the stones.

In a mixing bowl, beat the eggs together with the sugar. Add the ground almonds, the cinnamon, and the whipping cream. Mix through. Add the melted butter and stir until blended.

Pour half the batter into the shell and arrange the plum halves on it, overlapping slightly, starting from just inside the edge of the pan. Realize you didn't have enough plums and hurridly wash, dry, and cut some other fruit to fill in the center. Pour the rest of the batter over the plums and bake for 20 minutes.

Serve cool, decorate with confectioner's sugar or icing (more sugar?? I skipped that - the fruit and filling are sweet enough, with just enough plum tartness to make it taste like summer).

Friday, May 04, 2007

The Gorgonzola Cheesecake Dare

My mother was visiting recently, and downloaded this recipe to my desktop - she swears it is delicious, but I'm a bit wary of stinky cheese getting near the beloved cheesecake recipe - I have not yet been brave enough to try it - anyone else brave enough to take up the challenge?

Gorgonzola Cheese Cake

Crust:
4 ½ cups water
1 ½ cups corn meal
1 tablespoon garlic, minced
2 teaspoons salt
2 tablespoons dried oregano
½ cup Asiago cheese, grated

Pre-heat oven to 375 degrees.
Grease a 12 by 17 sheet pan. In a sauce pan, bring water to a boil and stir in corn meal, garlic, salt and oregano. Reduce heat to low and simmer for 15 minutes, stirring every few minutes. When mixture is cooked, stir in Asiago cheese and pour into the sheet pan and smooth out evenly. Set aside and let cool.

Filling:
12 cloves garlic, chopped
1 pound gorgonzola cheese, room temperature
5 (8 ounce) packages cream cheese, room temperature
5 eggs, room temperature

In a large mixer, place cream cheese, gorgonzola and garlic. Combine thoroughly. Add the eggs one at a time, blending well after each addition. Pour into corn meal crust and smooth out. Place cheese cake in middle of center rack. Bake for approximately 30 minutes, or until “insta-read” thermometer reads 160 degrees. Remove and let cool to room temperature.

This versatile dish can either be served as an appetizer by cutting into 1 inch cubes or as an entrée by cutting into 4 by 4 squares and served with your favorite salad and a glass of chardonnay.

(from Alexander Valley Vineyards)

Thursday, February 22, 2007

The Great Granola Disaster

The aptly named food writer, Mark Bittman, swept me off my feet with his recipe for no-knead bread, so of course I couldn’t wait to try his recipe for granola. Never mind that no one in my family likes granola. If Mark Bittman said it was good, I wanted to try it.

In his recipe, Mark lists honey or maple syrup as sweeteners, although he prefers to use maple syrup. I would, too, but at the time of my experiment only honey and brown sugar resided in my pantry. He also said to use any combination of nuts and seeds, such as almonds, pecans, walnuts, sesame seeds, or sunflower seeds. Well, I had loads of sunflower seeds -- salted ones at that -- so that’s what I used.

The granola I produced, all eight cups of it, turned out salty, sunflowery, and slightly burned. Trying to avoid a total loss, I made about ten dozen granola cookies, which I thought were pretty good, but they haven’t been moving too quickly. Usually, cookies last about 30 minutes at our house, and something tells me that we’ll still be looking at granola cookies 30 days from now.

Crunchy Granola
Makes 8 cups

6 cups old-fashioned rolled oats
2 cups mixed nuts & seeds, unsalted: sunflower seeds, sesame seeds, pecans, almonds, cashews, walnuts
1 cup dried unsweetened shredded coconut, optional
1 teaspoon ground cinnamon
Dash salt
1/2 to 1 cup maple syrup or honey
1 cup riasins or dried fruit, optional

Preheat oven to 350 degrees. In a bowl, combine oats, nuts and seeds, coconut, cinnamon, salt and sweetener. Place on a sheet pan and put in oven. Bake for 30 minutes, stirring occasionally. Mixture should brown evenly; the browner it gets without burning, the crunchier the granola will be.

Remove pan from oven and add raisins or dried fruit. Cool on a rack, stirring once in a while until granola reaches room temp. Transfer to a sealed container and store in refrigerator; it will keep indefinitely, especially if no one eats it.

Monday, January 15, 2007

The best bread ever


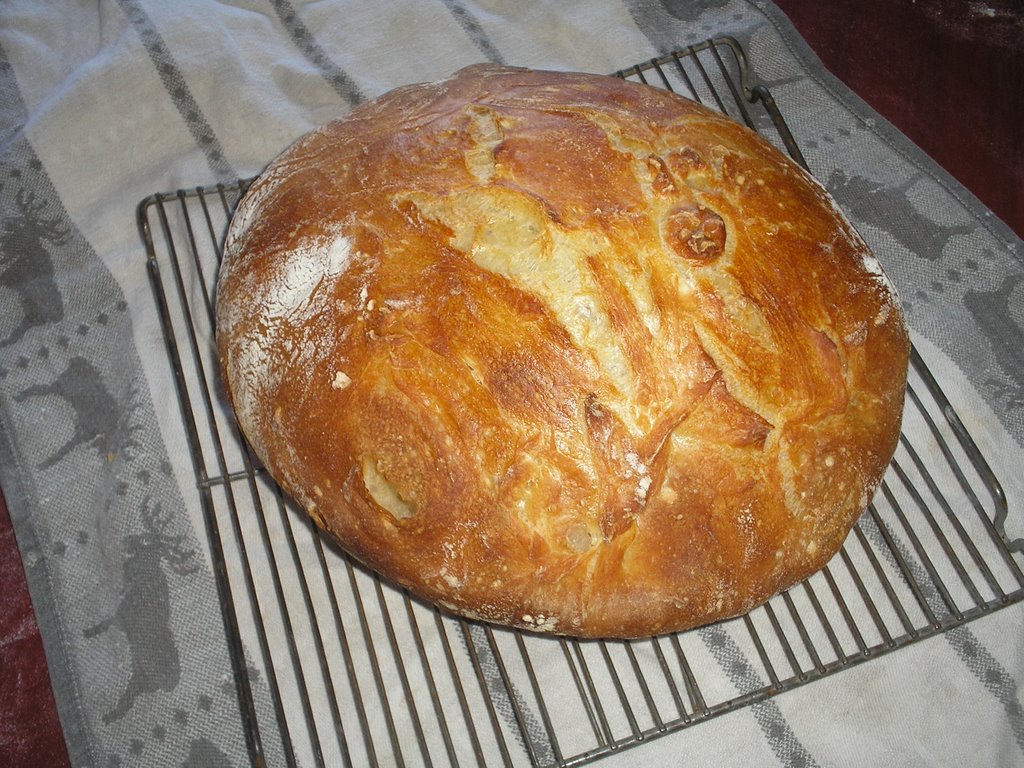
Presented here is an excerpt from an article that apeared last week in the Press Democrat. So far I have made three loaves of this bread, and have two more rising at this moment. It produces a rustic, Italian-style loaf that is delicious!

I have found that it needs more salt than the recipe calls for: 1-1/2 to 1-3/4 teaspoons tastes better. Also, the amount of water is approximate, although in the recipe it appears to be precise. Usually I use closer to two cups of water.


Greatest thing since sliced . . . . . ?

By MARK BITTMAN
NEW YORK TIMES


Jim Lahey's method of breadmaking requires no kneading. It uses no special ingredients, equipment or techniques. It takes very little effort. It produces a loaf that is incredible, a fine-bakery quality, European-style boule that will blow your mind.

It accomplishes all of this by combining a number of unusual features. Most notable is that you'll need about 24 hours to create a loaf; time does almost all the work. Lahey's dough uses very little yeast, a quarter teaspoon, and he compensates for this tiny amount by fermenting the dough very slowly. He mixes a very wet dough, about 42 percent water, which is at the high end of the range that professional bakers use to create crisp crust and large, well-structured crumb, both of which are evident in this loaf.

The dough is so sticky that you couldn't knead it if you wanted to. It is mixed in less than a minute, then sits in a covered bowl, undisturbed, for about 18 hours. It is then turned out onto a board for 15 minutes, quickly shaped, and allowed to rise again for a couple of hours. Then it's baked. That's it.

What makes Lahey's process revolutionary is the resulting combination of great crumb, lightness, incredible flavor - long fermentation gives you that - and an enviable, crackling crust, the feature of bread that most frequently separates the amateurs from the pros.

Lahey achieves the perfect crust by putting the dough in a preheated covered pot - a common one, a heavy one, but nothing fancy. For one loaf he used an old Le Creuset enameled cast iron pot; for another, a heavy ceramic pot. I have used cast iron with great success. By starting this very wet dough in a hot, covered pot, Lahey lets the crust develop in a moist, enclosed environment. The pot is in effect the oven, and that oven has plenty of steam in it. Once uncovered, a half-hour later, the crust has time to harden and brown, still in the pot, and the bread is done.

The entire process is incredibly simple, and, in the time I've been using it, absolutely reliable. Lahey thinks imprecision isn't much of a handicap and, indeed, his method seems to iron out the wrinkles: "I encourage a somewhat careless approach," he says.

It is best made with bread flour, but all-purpose flour works fine. I've played with whole-wheat and rye flours, too; the results are fantastic. The baking itself is virtually foolproof, so the most important aspect is patience. Long, slow fermentation is critical.

No-Knead Bread

Makes one 1-1/2-pound loaf
Time: About 1-1/2 hours plus 14 to 20 hours' rising

3 cups (430 grams) all-purpose or bread flour, more for dusting

1/4 teaspoon (1 gram) instant, or other, yeast

1-1/4 teaspoons (8 grams) salt

- Cornmeal or wheat bran as needed.

1. In a large bowl combine flour, yeast and salt. Add 1 1/4 cups (345 grams) water, and stir until blended; dough will be shaggy and sticky. Cover bowl with plastic wrap. Let dough rest at least 12 hours, preferably about 18, and up to 24, at warm room temperature, about 70 degrees.

2. Dough is ready when its surface is dotted with bubbles. Lightly flour a work surface and place dough on it; sprinkle it with a little more flour and fold it over on itself once or twice. Cover loosely with plastic wrap and let rest about 15 minutes.

3. Using just enough flour to keep dough from sticking to work surface or to your fingers, gently and quickly shape dough into a ball. Generously coat a cotton towel (not terry cloth) with flour, wheat bran or cornmeal; put dough seam side down on towel and dust with more flour, bran or cornmeal. Cover with another cotton towel and let rise for 2 to 3 hours. When it is ready, dough will be more than double in size and will not readily spring back when poked with a finger.

4. At least a half-hour before dough is ready, heat oven to 450 degrees. Put a 6- to 8-quart heavy covered pot (cast iron, enamel, Pyrex or ceramic) in oven as it heats. When dough is ready, carefully remove pot from oven. Slide your hand under towel and turn dough over into pot, seam side up; it may look like a mess, but that is OK. Shake pan once or twice if dough is unevenly distributed; it will straighten out as it bakes. Cover with lid and bake 30 minutes, then remove lid and bake another 15 to 30 minutes, until loaf is beautifully browned. Cool on a rack.

Sunday, November 12, 2006

Whole-wheat Focaccia

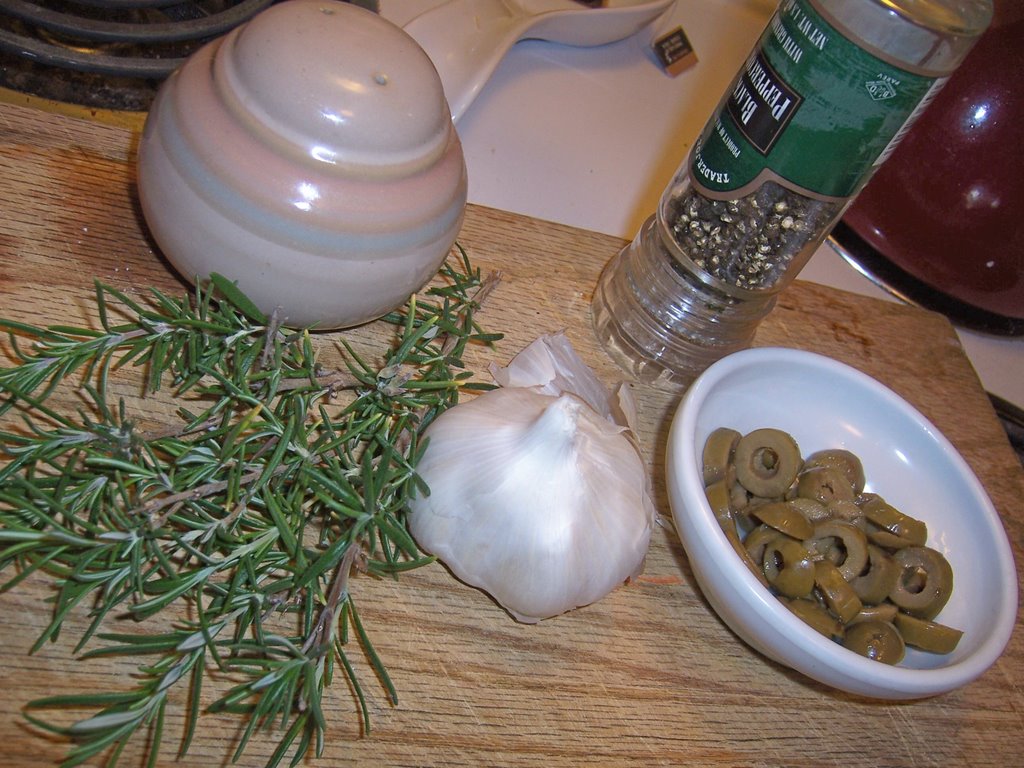
You will need:
3/4 oz fresh yeast, or 1 and a half packets active dry yeast
1 teaspoon sugar
3/4 cup lukewarm water

1 cup unbleached white flour
2 and a half cups whole-wheat flour
2 teaspoons salt
4 tablespoons olive oil (the good stuff if you have it)

4 cloves garlic, sliced in half, then half lenghwise again
chopped fresh rosemary
drained, sliced green olives (any variety you like will work)

To prepare the yeast:

This is not as daunting as it might sound. Place the yeast in a small bowl. Add the sugar and half the lukewarm water and stir carefully until the yeast has dissolved. Set bowl aside for 10-15 minutes, a foam will form on the surface. Stir the yeast again before proceeding to make the dough.

Combine both flours in a large bowl with the salt. Make a hollow in the flour and pour in 3 tablespoons oil, the yeast, and the remaining water. Use a wooden spoon to stir the mixture, until the flour has almost all been absorbed. *Note* Whatever brand whole-wheat flour I am using, seems to have super-absorbtion abilities, and I needed to add extra water, a little at a time, to get most of the dry ingredients incorporated.

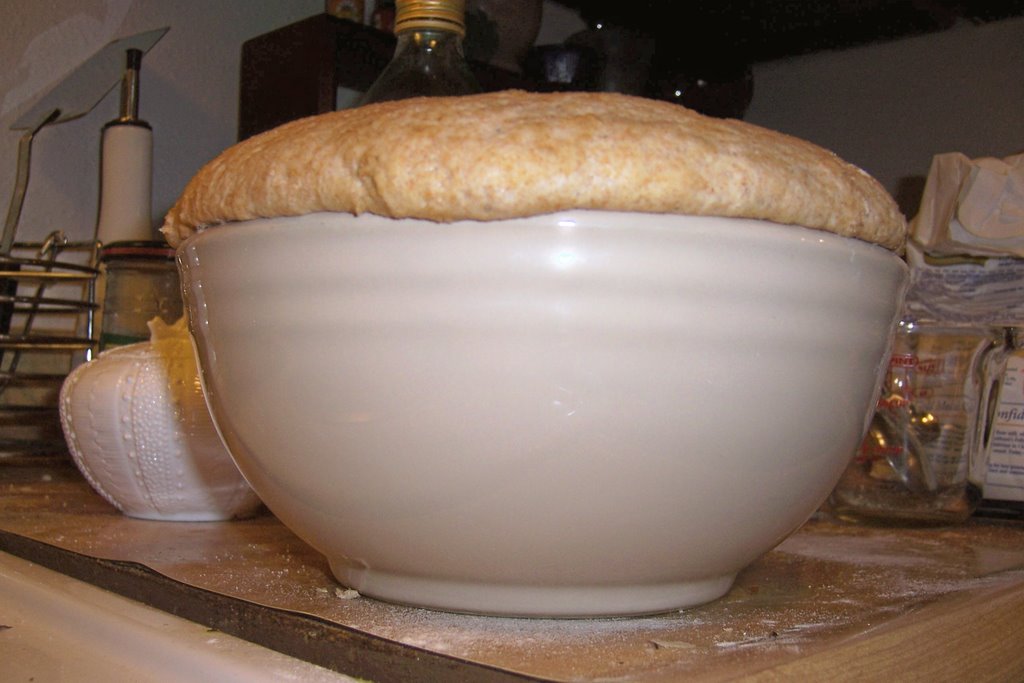
Cover with a dish-towel, and let rise for 1 and a half hours. The bowl I chose wasn't quite big enough, and it started to overflow.

Transfer the dough to a lightly floured work surface, and knead for 2-3 minutes, adding any chopped herbs you'd like.

Place the dough on an oiled baking sheet, and using your hands, spread it into whatever shape strikes your fancy. At first, this might seem futile, as the dough tends to want to pull back into a small ball, rather than stretch to my whim. Keep working - it will eventually obey you.

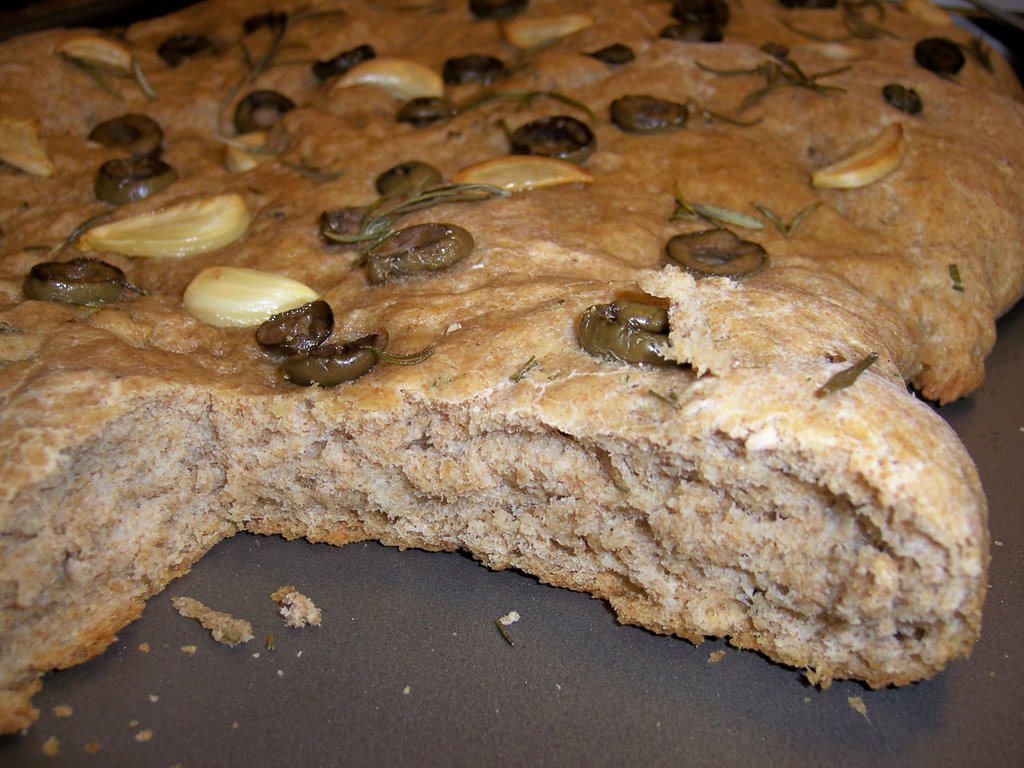
Garnish with anything - I scattered the sliced garlic and olives across the top, and then pressed them in. Sprinkled with some rosemary drizzled with the remaining oil, and it's ready to go into the overn, pre-heated to 400 degrees. Other topping variations include sea salt, sliced green chilies, thinly sliced Fontina cheese, chopped sage, basil etc., sliced red onions, and tomatoes. Bake for about 25 minutes, until top is slightly golden brown.

This is a very hearty focaccia, and seems better sliced open for a sandwich, or dipped into sauce, than on it's own. It toasts beautifully, though some of my toppings were more inclined to fall off the top. Next time, I will be mixing the garlic into the dough, so it's flavor is more pronounced.

Thursday, August 24, 2006

Why I Love Making Baklava

If you remember in my last Baklava post, I talked about how pouring the honey mixture was the best part, tonight I took video.

yay!


Photo Sharing - Upload Video - Video Sharing

Saturday, May 20, 2006

Must Love Butter

So, I may have posted about Baklava before, but I have made it several times in the last couple weeks, and so I am posting about it again. I like it because it easy, its good, and EVERYONE ALWAYS raves about it. I, of course, never tell anyone that the secret ingredient is enough butter to kill a horse, but what's a heart attack amoung friends?

Baklava:
1 lb Filo (phyllo) dough. Found in the freezer section of the grocery store.
a LOT of butter. I have used anywhere between 2-4 sticks. (.5-1 lb)
Nuts. I prefer walnuts, D prefers almonds. I like the bitterness of the walnuts. So I say walnuts.
Cinnamon.
Water
1 C sugar
1/2 C honey
Vanilla

If you remember ahead of time, pull the Filo out of the freezer and put it in the fridge a day or two before you make it. Filo dough will stay good for about 4 weeks in the fridge, and indefinitely in the freezer. If you DON'T remember, let it thaw for a couple hours on the counter.

Butter the bottom of a 9x13 pan. Melt a couple sticks of butter. In a chopper, blend the nuts (I use about 6-8 oz.) with cinnamon (uh...I just dump some in). Place nearby. GENTLY lift two sheets of the Filo and place it in the bottom of the pan. For the first few layers at the bottom, you may need to trim the ends off, it will be too long. Just use a sharp knife. Using a paintbrush-looking thing, butter the top of the Filo dough. Place 2 more sheets, butter and repeat.

When you are about 8 sheets deep (sheets. that mean about 4 rotations of layer and butter), dump a couple of tablespoons of the nut mixture onto the Filo. Spread it around so its evenly covering the Filo, then go back to the dough and the butter routine. I usually end up doing about 8 sheets, nuts, 8 sheets, nuts, 8 sheets, nuts and then 6-8 more sheets. Make sure you THUROUGHLY butter the top layer.

Now comes the hardest part of the whole adventure...cutting the baklava into square or diamonds. I guess the easiest way to do it is to cut about 4 sections lengthwise, and then diagonally across from there. It's a giant pain in the butt, and I have yet to find a way to do it that is any easier or faster than what I've done before. So, good luck with that.

After you have managed to cut that thing into a couple dozen pieces, put it in a 350* oven for 40-50 minutes. I find its usually done at 40. 25 minutes before the Baklava is going to come out of the oven, mix 1C sugar into 1C water on the stove. When the mix starts to boil, add the honey and a splash of vanilla. Let this simmer for about 20 minutes, until the baklava comes out the oven.

Now this is my favorite part!!! When the Baklava comes out of the oven, immediately pour the water/sugar/honey mix over the baklava. It bubble! It steams! It makes neat sounds! I love it!

Let the baklava cool a bit. If you are eating it at home, just get pieces from the pan. If you are taking it to a potluck or something, its far easier to put the pieces into those paper muffin cups. When storing baklava don't store it in an airtight container, or the fridge. The fridge makes it hard, and the airtight makes it soggy. Enjoy the baklava and the compliments!!

Saturday, April 22, 2006

Panadería

So, in Costa Rica, bakeries are the place to be. Actually, they are the makers of heavenly food. They make cakes, pastries, bread, and things filled with meat. I have compiled a list of the best things to buy if you ever decide to come to Costa Rica and go to a bakery.

1. Torta Chilena-this is layers of the flaky pastry stuff with caramel between the layers.

2. Lucrecia-a crouissant filled with jalapeño, toasted cheese, ground beef, and onions.

3. Enchilada-also a crouissant filled with potatos, something spicy, and ground beef.

4. Pudding-not real pudding, but it's got the texture of pudding and is really good.

5. Tres Leches-the best thing in the history of the world. It is a normal cakes soaked in sweetened condensed milk, evaporated milk, and regular milk. Hence the name, Tres Leches.

That's it. There are tons more but these are the ones to look for.

Tuesday, February 07, 2006

Just what the doctor ordered


It's been one of those weeks. By Tuesday night, therapy is needed. Brownies (from a box) and a couple glasses of 2002 Shiraz. Yes, I bought it for the label, which gives no information about the product in the bottle but insists that emus are, indeed, insane. Not great (bargain buy at the supermarket), but it'll do the trick, and I still won't do the dishes.

Thursday, December 15, 2005

Better than sex cake

What you need:

one box of devils food cake mix
one can of eagle brand sweetened condensed milk.
one jar of caramel or butterscotch ice cream topping
one big vat of cool whip
6, 7, 8 skor bars, (heath is ok-ish)

What you do

Put skore bars in freezer. make the cake in a 13 x 9 or so pan. When you take the cake out, lightly stab the top with a fork so the top is sort of broken up and crumply. If dont want your cake goo-ey, wait for it to cool. Otherwise, pour on condensed milk all over. Pour ice cream topping all over. Put in fridge for an hour or so. Then take it out and cover with lots of cool whip. Then take the skor bars out of the freezer. and crumple them up while still in wrappers. Spread the skor bar chunks on top. The more the better. put in fridge for a bit.

When you eat it, your toes will curl.

Wednesday, November 30, 2005

The end to Butter Misery

LONDON (Reuters) - Ever get frustrated with fresh-out-of the-fridge butter that is too hard to spread?

A UK-based company has launched a portable, temperature-controlled butter dish, ButterWizard, which keeps butter at what it says is the optimal spreadable temperature of 65 degrees Fahrenheit.

It has a built-in fan and a chip which together control the temperature, adjustable for different textures, be it super-soft bread, crusty toast or delicate biscuits. "We were trying to find out what people's frustration with butter was. It's either too hard or too soft," said David Alfille, managing director of East Sussex-based company Alfille Innovations Limited.

"ButterWizard heats or cools the butter and you can adjust the temperature to suit yourself."

Nutritionist Fiona Hunter said: "There are over 16 million UK households buying butter on a regular basis, but one complaint I hear time after time is the lack of spreadability of real butter."

"Butter has been part of diet for thousands of years. The important thing is to spread butter thinly," she added.

Sunday, October 30, 2005

Pumpkin Pie Cake

This is a wonderful alternative to pumpkin pie, especially if you have pie-crust-o-phobia like I do. The crunchy topping on this is really delicious.

Pumpkin Pie Cake

Preheat oven to 350 degrees.

1 large can pumpkin
1 13-oz. can evaporated milk (or use half-and-half)
3 eggs
1 Tb. pumpkin pie spice, or a mixture of 2 tsp. cinnamon and 1/2 tsp. each nutmeg, cloves, and ginger
1/2 tsp. salt
1 Tb. flour
1+1/2 cups sugar
Blend ingredients, beat well, and pour into 9 x 13 inch pan.

Topping:
1 package yellow cake mix
1+1/2 cups chopped walnuts or pecans
1 cup (2 sticks) melted butter
Sprinkle dry cake mix over pumpkin mixture and gently pat down with an implement; sprinkle nuts on top. Drizzle melted butter over nuts. Bake in 350 degree oven for 50-60 minutes or until done. Allow to cool for 2 hours. Serve with whipped cream.